There is a specific, intoxicating aroma that fills a kitchen when you begin making brown butter chocolate chip cookies. It is a scent defined by toasted hazelnuts, caramelized sugar, and the deep, earthy richness of melting dark chocolate.
These are not your average bakery treats; they are a masterclass in texture and flavor contrast. We have engineered this recipe to produce cookies with golden-brown, caramelized edges and pale, chewy centers that practically melt on the tongue.
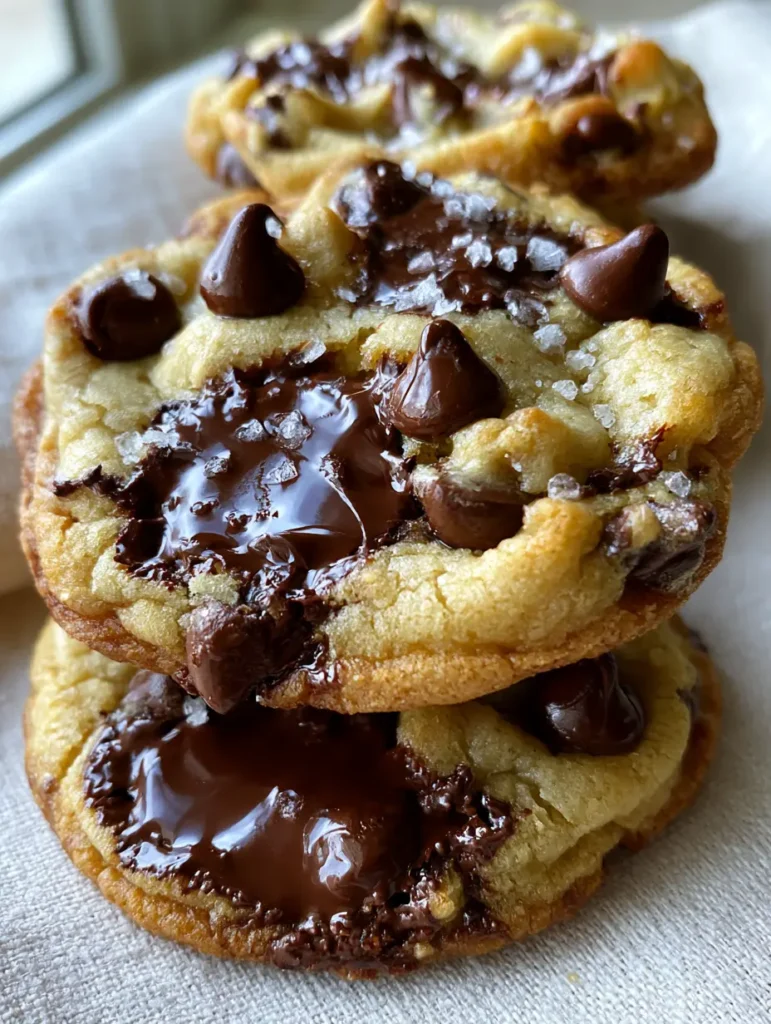
By using a combination of browned butter and specific chocolate layering techniques, you will achieve those iconic molten pools of dark chocolate seen in professional food photography. Every bite is balanced with a delicate sprinkle of flaky sea salt to cut through the richness.
Whether you are a seasoned baker or a curious novice, these brown butter chocolate chip cookies represent the pinnacle of home-baked indulgence. Let’s dive into the science of why this specific method produces the “wrinkled” fudgy interior that everyone craves.
Why These Brown Butter Chocolate Chip Cookies Stand Out
- The Nutty Complexity: Browning the butter transforms ordinary fat into a toasted, liquid gold that provides a sophisticated depth of flavor.
- Textural Perfection: We achieve the “holy grail” of cookie textures—a crisp, caramelized outer rim paired with a soft-baked, fudgy center.
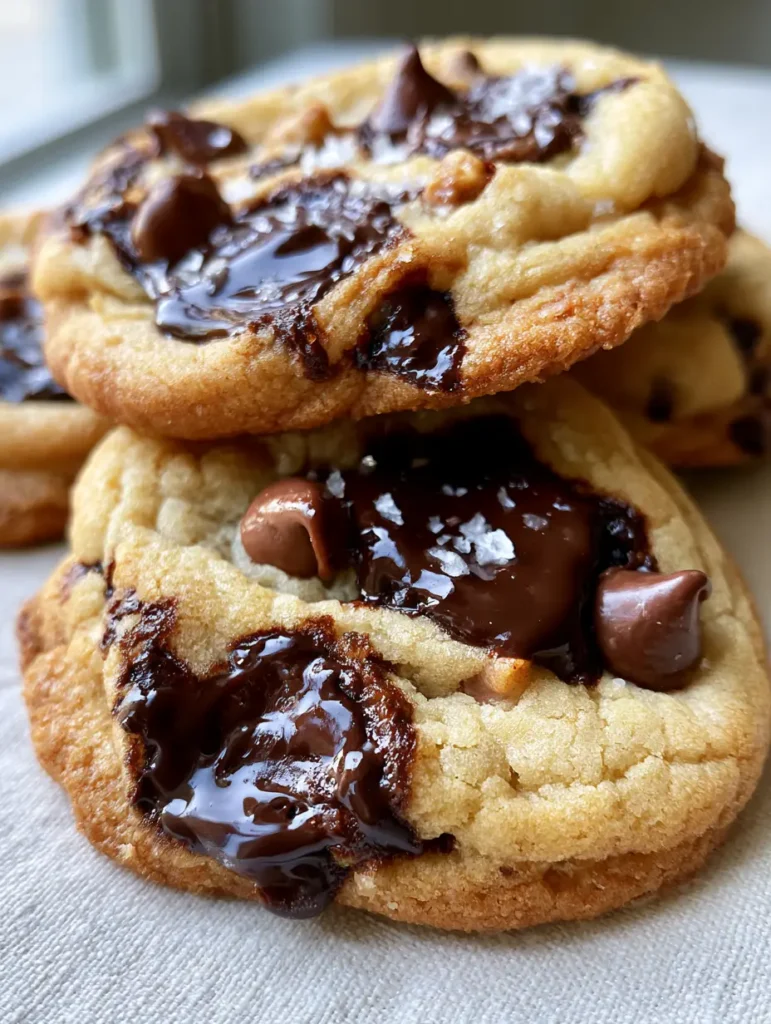
- Molten Chocolate Pools: By using chopped dark chocolate bars alongside semi-sweet chips, we create large, glistening areas of melted cocoa.
- Visual Appeal: The dough features a beautiful wrinkled and crackled surface, indicating a dense and moist interior rather than a cakey one.
The Anatomy of Ingredients for Professional Results
Unsalted Butter (1 cup / 227g): This is the soul of the recipe. We will simmer it until the milk solids toast, creating the “brown butter” foundation that defines the flavor profile.
Dark Chocolate Bar (4 oz / 113g): Chopping a high-quality bar is the secret to those molten pools. Unlike chips, bar chocolate is formulated to melt more fluidly under heat.
Semi-Sweet Chocolate Chips (1 cup / 170g): These provide structural “pockets” of chocolate. They hold their shape better than the bar chocolate, offering a varied texture in every bite.
Dark Brown Sugar (1 ¼ cups / 250g): The high molasses content in dark brown sugar is responsible for the chewy centers and the deep, caramelized sugar edges.
Granulated Sugar (½ cup / 100g): This ingredient assists with the crisping of the edges. It helps the cookies spread just enough to create that wrinkled, crackled surface.
All-Purpose Flour (2 ¼ cups / 280g): This provides the necessary structure. It is the canvas upon which the fats and sugars perform their magic.
Large Eggs (2, room temperature): Eggs provide emulsification and lift. Using room temperature eggs ensures they incorporate perfectly into the browned butter mixture.
Vanilla Extract (1 tbsp / 15ml): A heavy hand of vanilla acts as a flavor enhancer, bridging the gap between the toasted butter and the bitter dark chocolate.
Baking Soda (1 tsp / 5g): This is our primary leavening agent. It reacts with the brown sugar to create lift and promotes the beautiful browning of the dough.
Flaky Sea Salt (for topping): These fine flakes are scattered across the top of each cookie. They provide a vital sensory contrast to the sweet, molten chocolate.
Fine Sea Salt (½ tsp / 3g): This is whisked into the dry ingredients to ensure the entire dough is seasoned, preventing a one-note sweet flavor.
Essential Equipment for the Perfect Bake
To achieve the handheld smartphone photo aesthetic of thick, stacked cookies, you need a heavy-bottomed stainless steel saucepan. This allows you to monitor the color of the butter solids as they toast, preventing burning.
A large baking sheet lined with parchment paper is non-negotiable. You also need a standard 3-tablespoon cookie scoop to ensure every portion is uniform, which leads to even baking and professional-looking stacks.
The Technique of Toasting Liquid Gold
Mastering the Brown Butter Phase
Place your butter in a stainless steel saucepan over medium heat. Melt the butter, then continue to cook it while whisking constantly as it begins to foam and pop.
Listen for the sound cues; when the popping subsides and you see dark golden specks at the bottom, the butter is ready. It should smell intensely nutty—remove it from the heat immediately and pour into a heat-proof bowl to stop the cooking.
Building the Fudgy Dough Foundation
Combine the cooled brown butter with the brown and granulated sugars. Whisk vigorously for 2-3 minutes until the mixture looks like wet sand and the sugar begins to dissolve slightly into the fat.
Add the eggs and vanilla, whisking again until the batter lightens in color. This aeration is what creates the “crackled” top once the cookies hit the hot oven air.
The Folding and Inclusion Method
Gently fold in your dry ingredients using a spatula. Stop just before the last streaks of flour disappear to avoid overworking the gluten, which can make cookies tough instead of soft-baked.
Fold in the semi-sweet chips and the hand-chopped dark chocolate chunks. Ensure the chocolate is evenly distributed so every cookie gets a “molten pool” on the surface.
Achieving the Visual Aesthetic: Baking and Finishing
The Importance of the Chill Cycle
Scoop the dough into large mounds and place them on a tray. Cover and refrigerate for at least 2 hours, or ideally overnight. This allows the flour to hydrate and the brown butter to solidify, preventing excessive spreading.
Chilling the dough is what guarantees those thick, soft-baked centers. If you bake them immediately, the cookies will be thin and lack the iconic wrinkled texture.
The Final Bake and Sensory Cues
Preheat your oven to 350°F (175°C). Space the dough balls 3 inches apart on your parchment-lined sheet. Bake for 10-12 minutes.
Look for the visual cues: the edges should be a deep golden-brown and caramelized, while the centers should still look slightly underbaked and pale. As they cool, the centers will set into a fudgy, dense crumb.
The Finishing Touch: Flaky Salt
Immediately after removing the tray from the oven, sprinkle the fine flakes of sea salt over the glistening chocolate pools. The heat from the chocolate will help the salt adhere without dissolving it.
Expert Tips for Success
- The Pan Bang: Halfway through baking, firmly tap the baking sheet against the oven rack. This “bangs” the air out, creating those beautiful ripples and wrinkles on the surface.
- Use a Ring: If your cookies come out slightly irregular, place a circular biscuit cutter around the hot cookie and move it in a circular motion to “scoot” the edges into a perfect circle.
- Quality Matters: Since butter and chocolate are the stars, use the highest quality versions you can find. A European-style butter with higher fat content makes a noticeable difference.
- Room Temp Eggs: Cold eggs can seize the brown butter, causing it to clump. If you forgot to take them out, soak the eggs in warm water for 5 minutes.
Storage, Reheating, and Freezing
Store your brown butter chocolate chip cookies in an airtight container at room temperature for up to 4 days. To maintain that “soft-baked” texture, place a piece of white bread in the container; the cookies will absorb the moisture from the bread.
For a fresh-from-the-oven experience, reheat a cookie in the microwave for 8-10 seconds until the dark chocolate pools become molten again. You can also freeze the scooped dough balls for up to 3 months, baking them directly from frozen with an extra 2 minutes of bake time.
What to Pair with These Decadent Cookies
While these cookies are a star on their own, they fit perfectly into a dessert spread or a cozy afternoon snack. If you enjoy the contrast of sweet and savory, consider trying our savory cowboy butter on a warm baguette before diving into dessert.
For those hosting a dinner party, these cookies are a great follow-up to a lighter meal like this fresh grilled shrimp bowl. If you’re looking for more decadent inspirations, our southern peach cobbler cheesecake offers a similarly rich profile.
Frequently Asked Questions
You can, but the cookies will spread much thinner and won’t have the same thick, soft-baked center. Chilling for at least 2 hours is essential for the best texture.
Use a high-quality dark chocolate bar and chop it by hand into irregular chunks. These chunks melt more significantly than stabilized chocolate chips, creating molten pools.
Flaky sea salt (like Maldon) is best. The large, flat crystals provide a satisfying crunch and a clean salt flavor that complements the dark chocolate without being overpowering.
Cakey cookies often result from over-measuring flour or over-beating the eggs. Ensure you use the spoon-and-level method for flour and only whisk until the ingredients are just combined.
Browning the butter toasts the milk solids, creating a deep, nutty flavor and a toasted aroma that regular butter cannot provide. It also changes the water content, resulting in a fudgier cookie.
The Ultimate Brown Butter Chocolate Chip Cookie Recipe
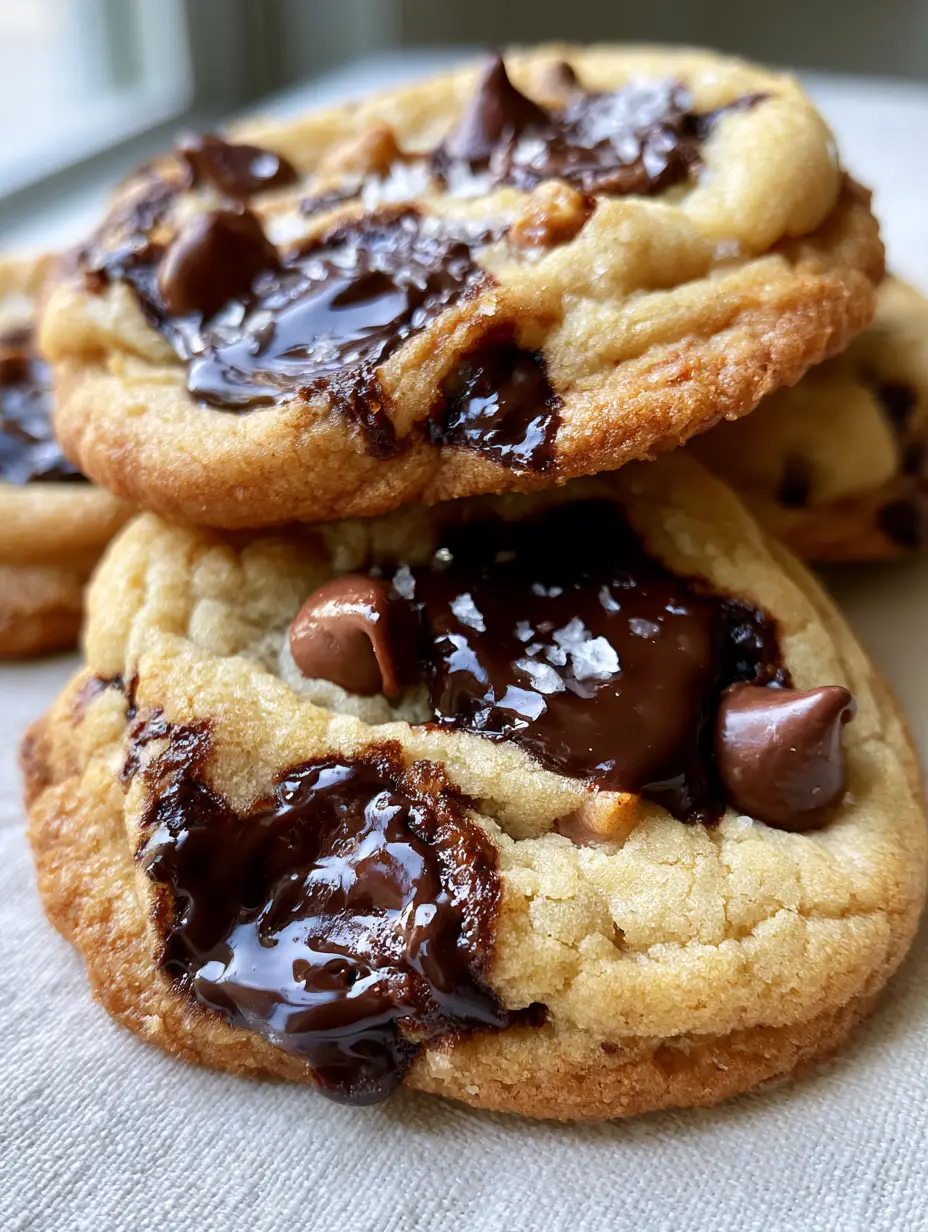
Brown Butter Chocolate Chip Cookies with Molten Dark Chocolate Pools
Ingredients
Equipment
Method
- In a stainless steel saucepan, melt butter over medium heat. Whisk as it foams and pops. Once it smells nutty and you see brown specks, remove from heat and pour into a bowl to cool.
- Whisk brown sugar, granulated sugar, and cooled brown butter until combined and slightly aerated.
- Whisk in eggs and vanilla until the mixture lightens in color and becomes smooth.
- Gently fold in flour, baking soda, and fine sea salt until just a few streaks of flour remain.
- Fold in the chopped dark chocolate and semi-sweet chips.
- Scoop dough into 3-tbsp balls. Refrigerate for at least 2 hours (ideally overnight) to ensure thick, soft centers.
- Bake at 350°F (175°C) for 10-12 minutes until edges are golden and centers are pale. Sprinkle with flaky sea salt immediately.
Notes
Use a high-quality dark chocolate bar for the best molten pools.
Closing and Call to Action
Mastering brown butter chocolate chip cookies is a rite of passage for every home baker. The combination of toasted butter, molten dark chocolate, and that signature flaky salt creates a flavor profile that is simply unmatched by standard recipes.
If you made these cookies and loved the “wrinkled” fudgy texture, please leave a comment below and let us know! Don’t forget to share your photos and tag us. For more rustic baking inspiration and kitchen secrets, be sure to follow us on Pinterest.