There is a specific kind of magic that happens when thinly sliced, spice-rubbed chicken meets the intense heat of a searing pan. The result is the Chicken Shawarma of your dreams: juicy on the inside with those iconic, dark brown crispy edges that define street-food excellence. If you have ever stood mesmerized by a vertical rotisserie, this recipe is designed to bring that high-end experience directly into your home kitchen using simple, accessible tools.
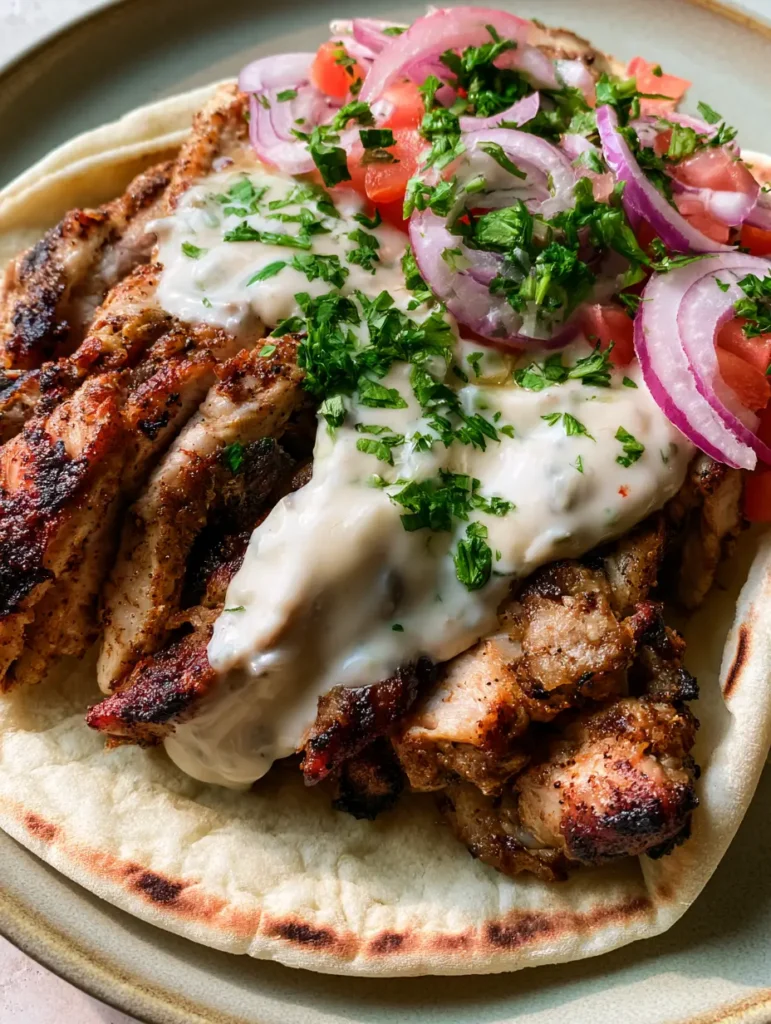
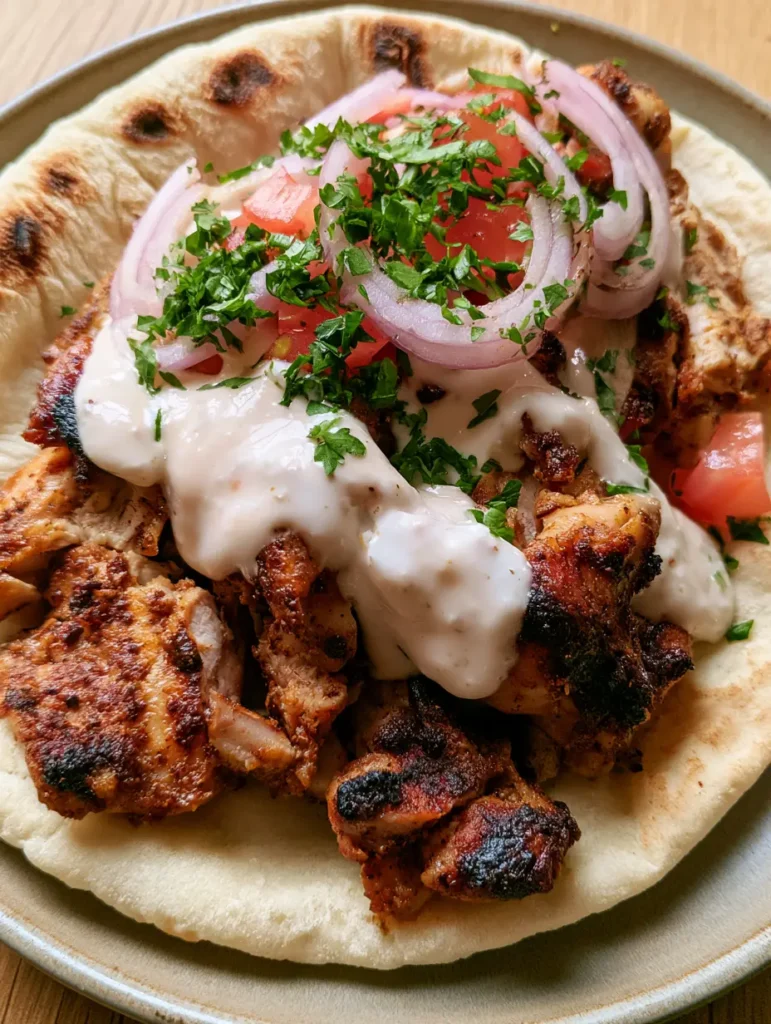
Our visual inspiration for this dish is the unedited, authentic aesthetic of a handheld smartphone photo—the kind of meal that looks so good you have to capture it before the first bite. This Chicken Shawarma isn’t about fussy plating; it is about the vibrant contrast of bright green parsley, ruby-red tomatoes, and the thick, opaque white drizzle of a traditional garlic sauce against a soft, lightly charred pita bread.
Whether you are looking for a reliable weeknight dinner or a show-stopping meal to share with friends, this recipe delivers on every sensory front. From the aromatic spice blend that fills your home to the tactile satisfaction of rolling up a warm wrap, every element has been calibrated for maximum flavor and culinary success. Get ready to master the art of the sear and the science of the sauce.
Why This Homemade Chicken Shawarma Beats the Local Takeout Spot
- The Maillard Reaction: By using high-heat searing techniques, we achieve the deep mahogany crust on the chicken thighs that usually requires a commercial spit.
- Cloud-Like Garlic Sauce: We move beyond basic mayo-based sauces to a traditional, thick garlic emulsion (toum style) that provides a pungent, creamy punch.
- Visual Texture Contrast: The combination of soft flour pita, crunchy raw red onion crescents, and juicy diced tomatoes creates a professional-grade mouthfeel.
- Handheld Perfection: This recipe focuses on the structural integrity of the wrap, ensuring your first bite is just as stable and delicious as the last.
The Anatomy of Flavor: Essential Ingredients and Science-Backed Substitutions
Boneless Skinless Chicken Thighs: We use 2 lbs (907g) of chicken thighs because their higher fat content compared to breasts prevents the meat from drying out during the high-heat searing process. Thighs stay succulent even when pushed to that dark brown, crispy limit.
The Signature Spice Rub: A blend of 1 tbsp (6g) ground cumin, 1 tbsp (6g) ground coriander, 1 tsp (2g) smoked paprika, and 1/2 tsp (1g) ground cinnamon. These warm, earthy spices penetrate the meat, while the sugars in the spices caramelize against the heat of the pan.
Neutral Searing Oil: Use 2 tbsp (30ml) of avocado or grapeseed oil. These have a high smoke point, allowing you to get the pan screaming hot without the oil breaking down and becoming bitter.
Fresh Garlic Cloves: For the sauce, you will need 4-5 large cloves (25g). Freshness is key here; older garlic can have a bitter green germ in the center which will ruin the purity of your white sauce.
Lemon Juice: Use 2 tbsp (30ml) of freshly squeezed juice. The acidity is required to stabilize the garlic emulsion and cut through the richness of the spice-rubbed chicken.
White Flour Pita Bread: Look for soft, pocketless pita if possible. We want a pliable base that can be lightly charred over an open flame or in a dry pan to add a smoky dimension to the wrap.
The Fresh Garnish Trio: 1/2 cup (15g) of finely chopped fresh parsley, 1/2 medium red onion (sliced into thin crescents), and 2 ripe Roma tomatoes (small diced). These raw elements provide the essential “crunch” and acid to balance the savory meat.
If you enjoy this flavor profile but want to try a different format, consider our cauliflower shawarma bowl for a plant-forward alternative that uses the same spice technology.
Must-Have Tools for the Ultimate Street Food Result
To achieve those professional seared edges, a 12-inch (30cm) cast-iron skillet is your best friend. Cast iron retains heat better than stainless steel, ensuring the temperature doesn’t drop when you add the chicken. If you don’t have cast iron, a heavy-bottomed non-stick pan will work, though the crust may be slightly less pronounced.
A high-speed blender or a small food processor is essential for the garlic sauce. We are looking for a thick, opaque consistency that holds its shape when drizzled, rather than a runny liquid. Finally, a sharp chef’s knife is non-negotiable for achieving those thin crescents of red onion and the fine “confetti” chop of the fresh parsley.
Step-By-Step: Mastering the Art of the Shawarma Sear
Phase 1: The Aromatic Marinade
In a large glass bowl, whisk together your cumin, coriander, turmeric, paprika, cinnamon, 1 tsp (6g) salt, and 2 tbsp (30ml) of olive oil. Thinly slice your chicken thighs into strips approximately 1/2 inch (1.2cm) wide before tossing them in the rub.
Ensure every piece of chicken is thoroughly coated. For the best depth of flavor, let this marinate in the refrigerator for at least 30 minutes, though 4 hours is ideal. This allows the spices to hydrate and the salt to tenderize the muscle fibers of the chicken.
Phase 2: Creating the Thick White Garlic Sauce
In your blender, combine the garlic cloves, lemon juice, and a pinch of salt. Pulse until the garlic is a fine paste. With the motor running on a low setting, very slowly drizzle in 1/2 cup (120ml) of neutral oil in a thin, steady stream.
Watch for the transformation: the mixture will turn from a yellow liquid into a thick, snowy-white cream. This is a mechanical emulsion. If the sauce looks too thin, continue adding oil one teaspoon at a time until it reaches a spreadable, drizzle-able consistency. This sauce is a great addition to other dishes like a chicken torta sandwich.
Phase 3: The High-Heat Skillet Sear
Place your skillet over medium-high heat and add your high-smoke-point oil. Wait until the oil is shimmering and just starting to release a tiny wisp of smoke. This is the visual cue that the pan is ready to create that “dark brown seared edge” described in our visual prompt.
Add the chicken in a single layer. Do not crowd the pan; if necessary, cook in two batches. Let the chicken sit undisturbed for 3-4 minutes. Resist the urge to move it! We need sustained contact to develop the crust. Flip and cook for another 3 minutes until the internal temperature reaches 165°F (74°C) and the edges are visibly charred.
Phase 4: Prepping the Fresh Garnishes
While the chicken rests, slice your red onion into thin crescents. To take the “bite” out of raw onion, you can soak the slices in ice water for 5 minutes and pat dry. Dice the tomatoes into small, uniform cubes, discarding the watery seeds to keep your wrap from getting soggy. Finely chop the parsley until it looks like green dust.
Phase 5: The Final Assembly
Briefly heat your pita bread directly over a gas flame for 10 seconds per side or in a dry pan until soft and pliable with small charred spots. Lay the pita on a neutral-toned plate. Spread a generous tablespoon of garlic sauce down the center.
Layer a handful of the seared chicken over the sauce. Top with the red onion crescents, diced tomatoes, and a heavy sprinkle of fresh parsley. Drizzle more garlic sauce over the top. Fold the sides inward to create the perfect handheld wrap.
Pro Tips for Culinary Excellence
- Don’t Wash the Chicken: To get a proper sear, the meat must be dry. Moisture is the enemy of the Maillard reaction; if the chicken is wet, it will steam instead of brown.
- Temperature Control: If your spices start to smell like they are burning (a bitter, acrid scent), turn the heat down slightly. You want “dark brown,” not “black ash.”
- The Resting Period: Let the chicken rest for 5 minutes after cooking. This allows the juices to redistribute, ensuring every bite is moist.
- Bread Pliability: If your store-bought pita is stiff, wrap it in a damp paper towel and microwave for 15 seconds before charring it. This makes it much easier to roll without cracking.
Storage, Reheating, and Make-Ahead Advice
The seared chicken stores beautifully in an airtight container for up to 4 days. To reheat, avoid the microwave as it can make the chicken rubbery. Instead, toss the meat back into a hot, dry skillet for 2 minutes to revive those crispy edges. The garlic sauce will keep for up to 2 weeks in the fridge, but it will become more pungent as the garlic “ages” in the oil.
We do not recommend freezing the assembled wrap or the fresh vegetables. However, you can freeze the raw, marinated chicken in a freezer bag for up to 3 months. Simply thaw overnight in the fridge and sear as directed for a quick, fresh-tasting meal. This flavor profile also works exceptionally well when prepared alongside sheet pan chicken fajitas for a fusion-style meal prep week.
What to Serve with Chicken Shawarma
While this wrap is a complete meal on its own, it pairs perfectly with a side of crispy fries or a bright cucumber-feta salad. If you are looking for other high-protein chicken dishes to add to your rotation, you might enjoy the bold flavors of our gochujang chicken or the creamy comfort of a chicken ramen with garlic sauce.
Frequently Asked Questions
Yes, you can roast the chicken at 425°F (220°C), but for the best ‘street-food’ texture, we recommend a quick sear in a skillet at the end to get those crispy, charred edges.
The secret is using a cast iron skillet and not overcrowding the pan. Heat the oil until it’s shimmering, then place the chicken in a single layer and let it sit undisturbed for several minutes to allow the Maillard reaction to occur.
While similar, pita is usually leaner and often has a pocket, whereas naan is traditionally made with yogurt or milk for a softer, fluffier texture. For shawarma, a soft flour pita is traditional.
If your garlic sauce (toum) hasn’t thickened, continue to slowly drizzle in a bit more neutral oil while blending. The emulsion depends on the ratio of oil to the water content in the lemon juice and garlic.
Boneless, skinless chicken thighs are the best choice. They have a higher fat content than chicken breasts, which allows them to stay juicy while achieving the high-heat char required for authentic shawarma flavor.
The Ultimate Chicken Shawarma Recipe
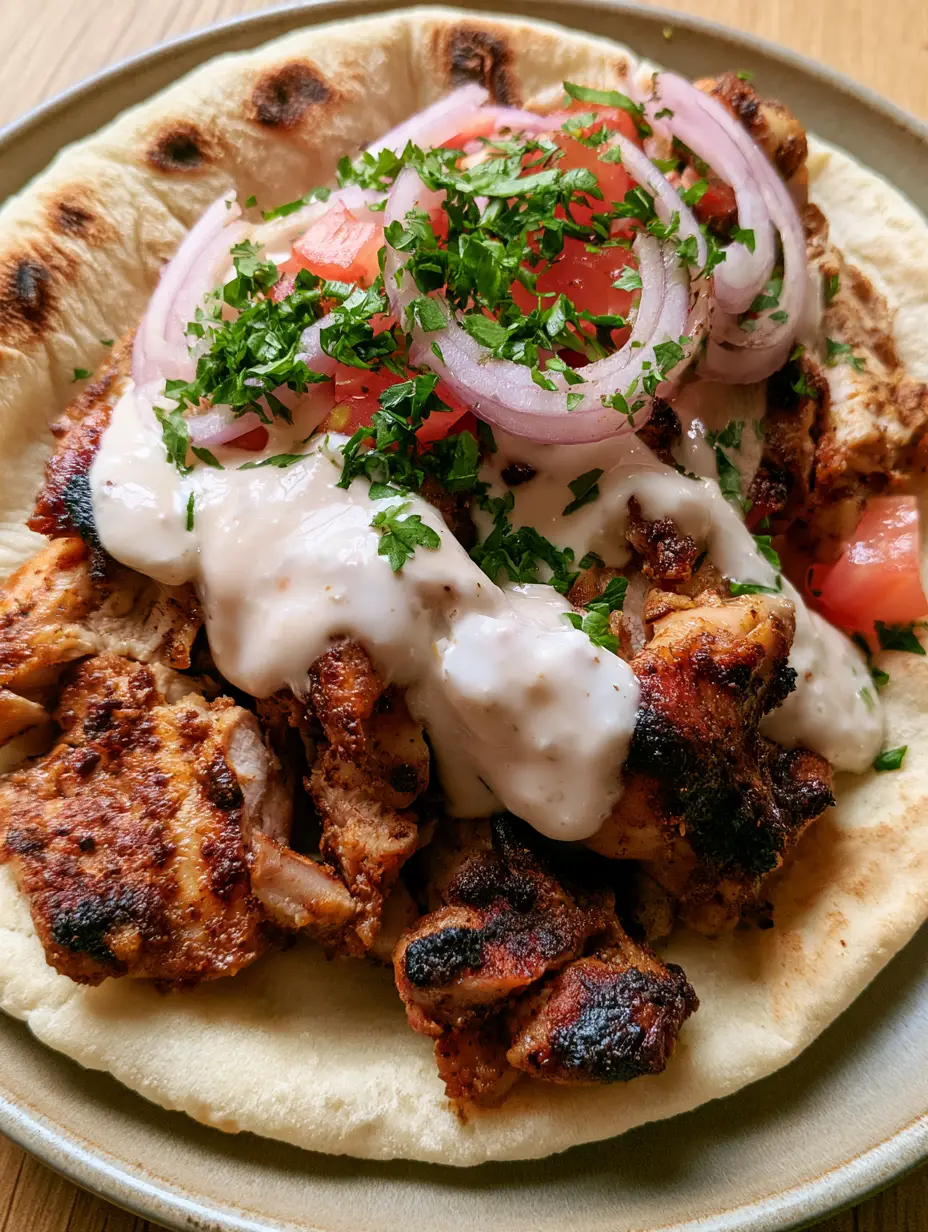
Chicken Shawarma with Authentic Garlic Sauce and Charred Pita
Ingredients
Equipment
Method
- In a large bowl, combine sliced chicken thighs with cumin, coriander, paprika, cinnamon, and oil. Toss to coat and marinate for 30 minutes.
- Pulse garlic, lemon juice, and salt in a blender. Slowly drizzle in oil while blending until a thick, white emulsion forms.
- Heat oil in a cast iron skillet over medium-high heat. Sear chicken in batches for 3-4 minutes per side until dark brown edges appear.
- Warm pita bread over an open flame or in a dry pan until lightly charred and pliable.
- Spread garlic sauce on pita, top with chicken, red onion, tomatoes, and parsley. Drizzle with extra sauce and serve.
Notes
For the garlic sauce, ensure the garlic is fresh to avoid any bitterness.
Wrap Up Your Cravings!
Making Chicken Shawarma at home is a rewarding culinary journey that transforms simple ingredients into a complex, satisfying masterpiece. The combination of the warm, spiced meat and the cool, sharp garlic sauce is a timeless pairing that never fails to impress. If you enjoyed this recipe, please leave a comment below and let us know how your sear turned out!
Don’t forget to sign up for our newsletter for more professional kitchen secrets and follow us on Pinterest to save this recipe to your “Dinner Goals” board. Sharing is caring—pin this to your favorite board now!