There is something undeniably magnetic about a fresh batch of Oreo Rice Krispie Treats resting on a sheet of white parchment paper. One glance at these thick, square-cut cereal bars, and your mouth instantly begins to water. They are the perfect marriage of a nostalgic childhood favorite and the universally beloved dark chocolate sandwich cookie.
When you pull one of these bars apart, you are immediately greeted by strands of gooey, melted white marshmallows stretching between densely packed crisped rice cereal. Every single bite is heavily speckled with coarse chunks of dark chocolate Oreo cookies, bringing a rich, cocoa-infused crunch that cuts through the sweetness. The contrasting textures of the white marshmallow cereal base and the visible dark cookie crumbs elevate this simple no-bake dessert to a bakery-level masterpiece.
Achieving that distinctly chewy, sticky, and chunky texture requires more than just throwing ingredients into a bowl. By using a specific ratio of foundational ingredients—like rich butter and pure vanilla extract—you can create a structurally sound, ultra-thick bar that remains soft for days. Let’s dive into exactly how you can master these beautifully speckled, marshmallow-packed treats in your own kitchen.
Why You’ll Love This Recipe
- Unbeatable Texture: By reserving a portion of the mini marshmallows to fold in at the very end, you create pockets of intact, gooey marshmallow that pull apart slightly when you break the bar in half.
- Bakery-Style Thickness: Pressing the mixture into an 8×8-inch pan guarantees tall, thick square-cut cereal bars rather than the thin, flat squares you usually see in store-bought boxes.
- Intense Cookie Crunch: Coarse chunks of dark chocolate Oreo cookies with white cream filling are folded in at the very last second, ensuring they retain their signature crunch and don’t turn into a soggy mess.
- Perfectly Balanced Flavor: The addition of a small pinch of sea salt and pure vanilla extract enhances the white marshmallow base, preventing the treats from tasting purely of flat, overwhelming sugar.
Ingredients & Substitutions

Crisped Rice Cereal: You will need 6 cups (160g) of standard, unflavored crisped rice cereal to serve as the structural foundation of the bars. This ingredient provides the essential light, airy crunch that defines the classic treat.
Mini White Marshmallows: You will use a total of 16 oz (450g) of mini white marshmallows, divided. Mini marshmallows melt much faster and more evenly than standard-sized ones, preventing the sugars from overheating and hardening.
Unsalted Butter: We use 1/2 cup (113g) of unsalted butter to create a rich, luxurious liquid binder. The fat in the butter coats the cereal, preventing the melted marshmallows from turning into a tough, impenetrable cement.
Oreo Cookies: Grab 20 dark chocolate sandwich cookies with white cream filling and roughly chop them. You want coarse chunks to ensure visible dark cookie crumbs throughout the white marshmallow base, delivering an intense chocolate flavor.
Vanilla Extract: Adding 1 tsp (5ml) of pure vanilla extract elevates the store-bought marshmallows, making them taste like an expensive, homemade vanilla bean confection. It perfectly bridges the flavor gap between the cereal and the cookie cream filling.
Sea Salt: A modest 1/4 tsp (1g) of fine sea salt acts as an invisible flavor enhancer. It cuts through the sticky melted white marshmallows, balancing the overall sweetness and amplifying the cocoa notes in the cookies.
Equipment Needed
To achieve the exact thick, square-cut visual profile, you will need an 8×8-inch square baking pan. If you use a standard 9×13-inch pan, your treats will spread out and become far too thin. You will also need high-quality white parchment paper to line the pan; this ensures the sticky bars can be lifted out completely intact without tearing.
Additionally, use a large heavy-bottomed pot or Dutch oven for melting the butter and marshmallows. A heavy pot distributes heat evenly, preventing the delicate marshmallow sugars from scorching. Finally, a firm silicone spatula is absolutely mandatory for folding the dense, sticky mixture together without crushing the delicate cereal.
Step-by-Step Instructions
1. Prepare Your Pan and Ingredients
Line your 8×8-inch square baking pan with white parchment paper, leaving an overhang on two sides so you can easily lift the bars out later. Lightly grease the parchment paper with a tiny amount of butter or non-stick spray. Coarsely chop your Oreo cookies, ensuring you have distinct chunks rather than fine dust, and set them aside.
2. Melt the Butter and Marshmallows
Place your large, heavy-bottomed pot over medium-low heat and melt the 1/2 cup (113g) of unsalted butter. Once the butter is completely melted and bubbling slightly, reduce the heat to low. Add all but 2 cups of the mini white marshmallows into the pot, reserving the extra for later.

3. Create the Gooey Marshmallow Base
Stir the marshmallows continuously with your silicone spatula until they are completely melted into a smooth, glossy, liquid web. Immediately remove the pot from the heat to prevent the sugars from crystallizing. Stir in the 1 tsp (5ml) of vanilla extract and 1/4 tsp (1g) of sea salt until fully incorporated.
4. Fold in the Cereal and Cookies
Working quickly off the heat, pour the 6 cups (160g) of crisped rice cereal into the melted marshmallow mixture. Gently fold the cereal in until it is about halfway coated. Next, add in the coarsely chopped dark chocolate Oreo cookies and the 2 cups of reserved mini white marshmallows.
5. Press and Cool
Continue folding gently until the cereal is evenly coated, taking care not to crush the crispy grains or melt the newly added marshmallow pockets. Transfer the sticky, dense mixture to your prepared baking pan. Using a buttered spatula or damp fingertips, very gently press the mixture into an even layer, ensuring you do not pack it down too tightly.
6. Slice into Thick Squares
Allow the Oreo Rice Krispie Treats to cool completely at room temperature for about 1 hour. Once set, use the parchment paper overhang to lift the entire block out of the pan. Place it on a cutting board and use a large, sharp chef’s knife to slice the block into 9 thick square-cut cereal bars.
Expert Tips for Success
- Do Not Overpack: When transferring the sticky mixture to your pan, press it down just enough to flatten the top. Pressing too forcefully will crush the cereal and compress the air pockets, resulting in rock-hard treats rather than distinctly chewy ones.
- Control Your Heat: Always melt your butter and marshmallows on low heat. High heat causes the sugars in the marshmallow to heat up too quickly and harden as they cool, ruining that gooey melted texture.
- Sift the Cookie Crumbs: After chopping your Oreos, consider shaking them lightly in a mesh sieve to remove the finest powdery dust. You want coarse chunks and visible dark cookie crumbs, but too much fine powder will turn the white marshmallow base an unappetizing gray.
- The Damp Finger Trick: If the marshmallow mixture is sticking relentlessly to your spatula when pressing it into the pan, lightly wet your fingers with cold water. The wet surface repels the sticky melted white marshmallows effortlessly.
Storage & Freezing Instructions
To maintain their perfectly chewy, distinctly sticky texture, store these Oreo Rice Krispie Treats in an airtight container at room temperature for up to 4 days. You can place sheets of parchment paper between the layers to prevent the gooey melted white marshmallows pulling apart and sticking to the other bars.
Do not store these in the refrigerator, as the cold temperatures will harden the butter and marshmallows, making the bars incredibly difficult to bite into. If you want to freeze them for longer storage, individually wrap each thick square-cut bar tightly in plastic wrap, then place them in a heavy-duty freezer bag. Freeze for up to 2 months, and allow them to thaw at room temperature for 30 minutes before enjoying.
What to Serve With This
While these decadent, chunky dessert bars are incredible on their own, they make the perfect sweet finale to a cozy family dinner or a vibrant weekend potluck. If you are hosting a casual gathering, start the evening by serving crowd-pleasing appetizers like baked potato skins, cheeseburger pretzel bombs, or buffalo cauliflower bites. Moving into the main course, hearty, comforting dishes pair wonderfully with the nostalgic vibe of a rice krispie treat. Consider a warm, bubbling tray of crockpot baked ziti or an effortlessly rich marry me chicken recipe.
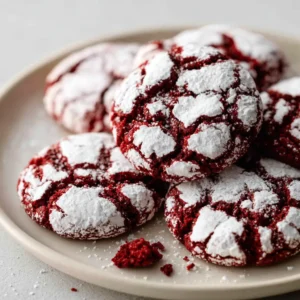
If you’re planning an epic dessert table for a holiday or celebration, these thick square-cut Oreo cereal bars look phenomenal displayed on a platter alongside other textural delights. Pair them with vibrant, colorful red velvet crinkle cookies, delicate strawberry cheesecake truffles, or soft-baked blueberry white chocolate cookies. For a fully chocolate-themed dessert spread, serve these marshmallow squares next to crumbl copycat red velvet cookies and some rich irish cream brownie cookies.
Don’t forget about your lunch prep! These treats are the ultimate lunchbox surprise. Pack one alongside a hearty, nutrient-dense mid-day meal like black lentil mediterranean salad, a savory salmon rice bowl, or a simple rotisserie chicken salad. The contrast between a savory, protein-packed lunch and the incredibly sweet, sticky crunch of dark chocolate Oreo cookies with white cream filling will make your afternoon completely unforgettable.
Frequently Asked Questions
Absolutely. To double the recipe, use a standard 9×13-inch baking pan instead of an 8×8-inch pan. You will still achieve a wonderfully thick bar, just yield a larger batch perfect for potlucks and parties.
Yes, you can use large marshmallows, but they take longer to melt. It is highly recommended to cut them into smaller pieces first to ensure they melt smoothly without the butter separating or the sugars burning.
No! Keep the white cream filling intact. The cream adds extra sweetness and blends beautifully with the sticky melted white marshmallows, enhancing the overall cookies and cream flavor profile.
To keep them exceptionally soft, ensure you use the correct ratio of butter to marshmallows and store them in an airtight container at room temperature. Never refrigerate the bars, as the cold air hardens the butter and marshmallow binder.
Treats usually turn out hard for two main reasons: melting the marshmallows over high heat, which crystallizes the sugar, or pressing the mixture too firmly into the baking pan, which crushes the airy cereal.
Ready to Make This Recipe?
If you loved making these thick square-cut Oreo Rice Krispie Treats, please leave a star rating and a comment below to let us know how your batch turned out! Your feedback helps other enthusiastic home cooks achieve that perfectly gooey, pulling marshmallow texture. Be sure to subscribe to our newsletter for more bakery-quality dessert recipes delivered straight to your inbox.

Recipe Schema
The Ultimate Thick & Chewy Oreo Rice Krispie Treats
Ingredients
Equipment
Method
- Line an 8x8-inch square baking pan with white parchment paper, leaving an overhang on the sides. Lightly grease the paper. Coarsely chop the Oreo cookies and set aside.
- In a large, heavy-bottomed pot over medium-low heat, melt the unsalted butter. Once bubbling slightly, reduce heat to low and add all but 2 cups of the mini marshmallows.
- Stir continuously with a silicone spatula until the marshmallows are completely melted and smooth. Immediately remove from heat. Stir in the vanilla extract and sea salt.
- Pour the crisped rice cereal into the pot and gently fold until halfway coated. Add the chopped Oreo cookies and the reserved 2 cups of mini marshmallows, folding gently until everything is evenly incorporated.
- Transfer the dense, sticky mixture into the prepared baking pan. Using lightly damp fingers, gently press the mixture into an even layer without packing it down too tightly.
- Allow the treats to cool at room temperature for 1 hour. Lift the block out using the parchment overhang, place on a cutting board, and slice into 9 thick squares.
Notes
Tip 2: Always melt your marshmallows over low heat to prevent the sugars from crystallizing, which ensures a soft, gooey pull.
Tip 3: Store in an airtight container at room temperature for up to 4 days.