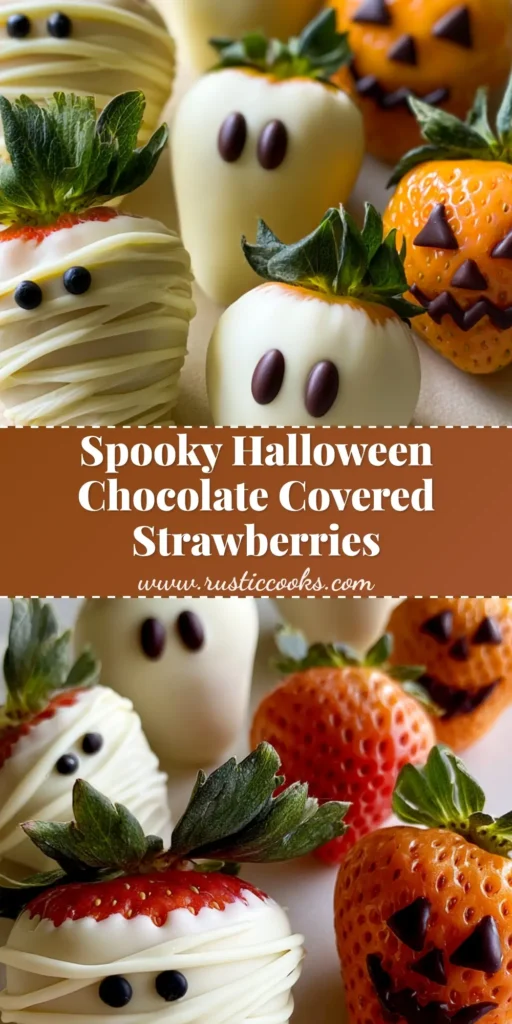
There is nothing quite like the sight of festive, hand-dipped treats to signal the arrival of the spooky season. These Halloween chocolate covered strawberries are the perfect marriage of fresh, juicy fruit and decadent, snappy chocolate, transforming simple produce into edible works of art. Whether you are hosting a haunted house warming or just looking for a fun kitchen project with the family, these berries offer a professional-grade aesthetic that is surprisingly simple to achieve at home.
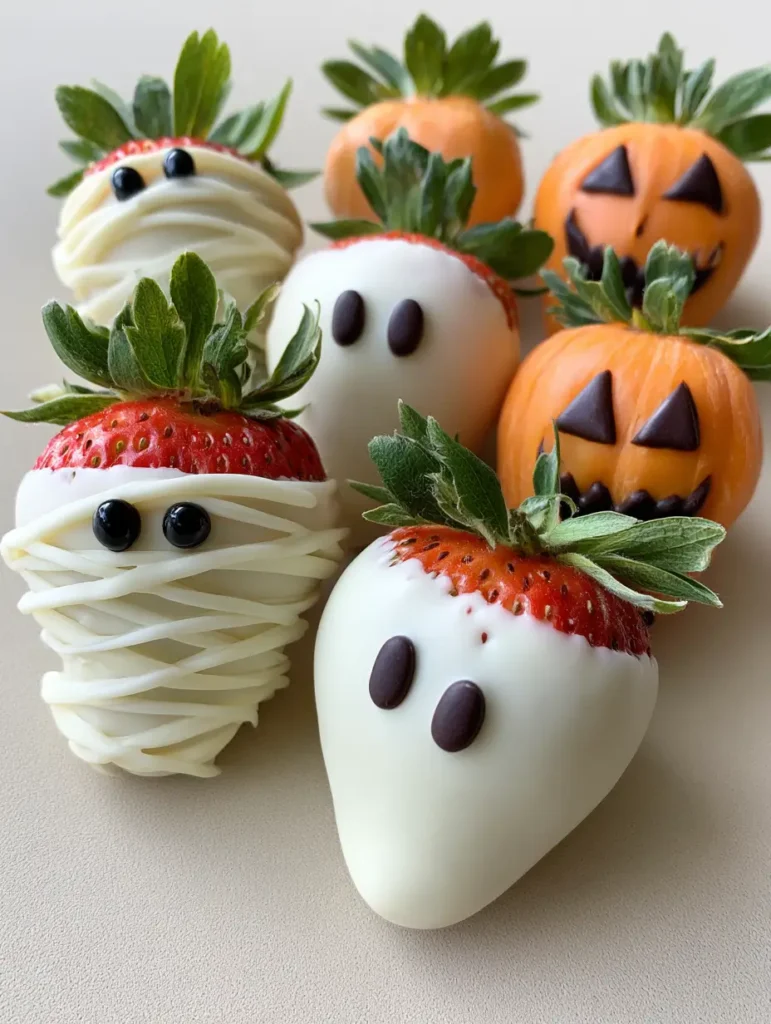
The visual appeal of these treats lies in their variety. From the eerie glow of white chocolate mummies to the vibrant orange of jack-o-lanterns and the classic simplicity of ghostly faces, this trio covers the entire spectrum of Halloween charm. We have designed this guide to ensure your chocolate stays smooth, your designs stay sharp, and your stems stay perfectly green for that “straight from the patch” look.
Achieving the professional finish seen in our Pinterest inspiration requires a few forensic culinary details. We aren’t just dipping; we are sculpting with temperature-controlled chocolate to ensure every mummy bandage and jagged pumpkin mouth looks like it came from a high-end confectionery shop. Let’s dive into the science and art of the perfect Halloween chocolate covered strawberries.
Why These Haunted Berry Bites Are the Ultimate Party Showstopper
- Textural Contrast: You get the crisp, audible snap of tempered white chocolate followed immediately by the burst of juice from a perfectly ripe, room-temperature strawberry.
- Visual Forensics: Each berry is a miniature canvas, featuring intricate piped bandage layers for mummies and precise triangular dark chocolate features for pumpkins.
- Customizable Complexity: While they look elite, the techniques used—dipping, drizzling, and dotting—are accessible for any home cook looking to elevate their dessert game.
- Natural Freshness: Unlike heavy candies, the acidity of the fresh fruit cuts through the sweetness of the white chocolate coating, making them dangerously snackable.
The Essential Spooky Berry Toolkit: Ingredients and Science
1 lb (454g) Large Fresh Strawberries: Choose berries with vibrant red skin and lush, green stems. The stems act as a natural handle for dipping and provide a beautiful color contrast against the white and orange chocolate.
12 oz (340g) Premium White Chocolate Melting Wafers: Use high-quality wafers containing cocoa butter for the smoothest melt. This serves as the base for our mummies, ghosts, and orange-tinted jack-o-lanterns.
4 oz (113g) Dark Chocolate Chips: These are used for the precision detail work. The dark chocolate provides the necessary contrast for the ghost ovals and the jagged pumpkin mouths.
1 tbsp (15ml) Coconut Oil or Shortening: Dividing this between your chocolate bowls helps thin the mixture. This ensures a “matte-smooth” finish and prevents the chocolate from being too thick and clumping during the dip.
Orange Oil-Based Food Coloring: It is vital to use oil-based coloring rather than water-based gels. Water is the enemy of chocolate and will cause it to “seize” into a grainy, unworkable mess instantly.
24 Small Black Candy Eyeball Sprinkles: These tiny forensic details are what bring the mummy berries to life. They should be placed while the bandage drizzle is still slightly tacky to ensure they “lock” into place.
Must-Have Equipment for Confectionery Success
To achieve the handheld smartphone photo-ready look, you’ll need a few specific tools. A microwave-safe glass bowl is best for gentle heating, as glass retains heat well to keep your chocolate fluid longer. You will also need parchment paper or a silicone baking mat to ensure the berries release cleanly once set without tearing the chocolate bottom.
For the intricate Mummy bandages and Jack-o-lantern faces, disposable piping bags or small zip-top bags with the corner snipped off are essential. If you want even more precision, a toothpick can be used to drag the dark chocolate into the perfect jagged mouth shape. Lastly, a sturdy baking sheet provides the flat surface needed for the chocolate to set into that smooth, professional base.
From Fresh Fruit to Haunted Masterpiece: The Step-by-Step Method
Preparing the Perfect Strawberry Canvas
The most common failure in making Halloween chocolate covered strawberries is moisture. Wash your berries and dry them individually with a paper towel, then let them air-dry for at least 30 minutes. If there is even a single drop of water on the skin, the chocolate will slide right off like a ghost through a wall.
Melting for a Silky, Matte Finish
Melt your white chocolate in 30-second intervals in the microwave, stirring vigorously between each heat cycle. Once smooth, stir in your coconut oil. Divide the white chocolate into two bowls, adding your orange oil-based tint to one until you reach a bright, “pumpkin-patch” orange. Keep your dark chocolate in a third, smaller bowl for the facial details.
The Art of the Dip and Set
Hold a strawberry by its green leafy stem and pull the leaves back slightly. Dip the berry into the chocolate (white for ghosts/mummies, orange for pumpkins), rotating it to cover all sides. Lift it up and let the excess drip off before placing it on the parchment paper. Watch for the “set”—the chocolate should transition from a liquid sheen to a smooth, matte finish as it cools.
Piping the Mummy, Ghost, and Pumpkin Details
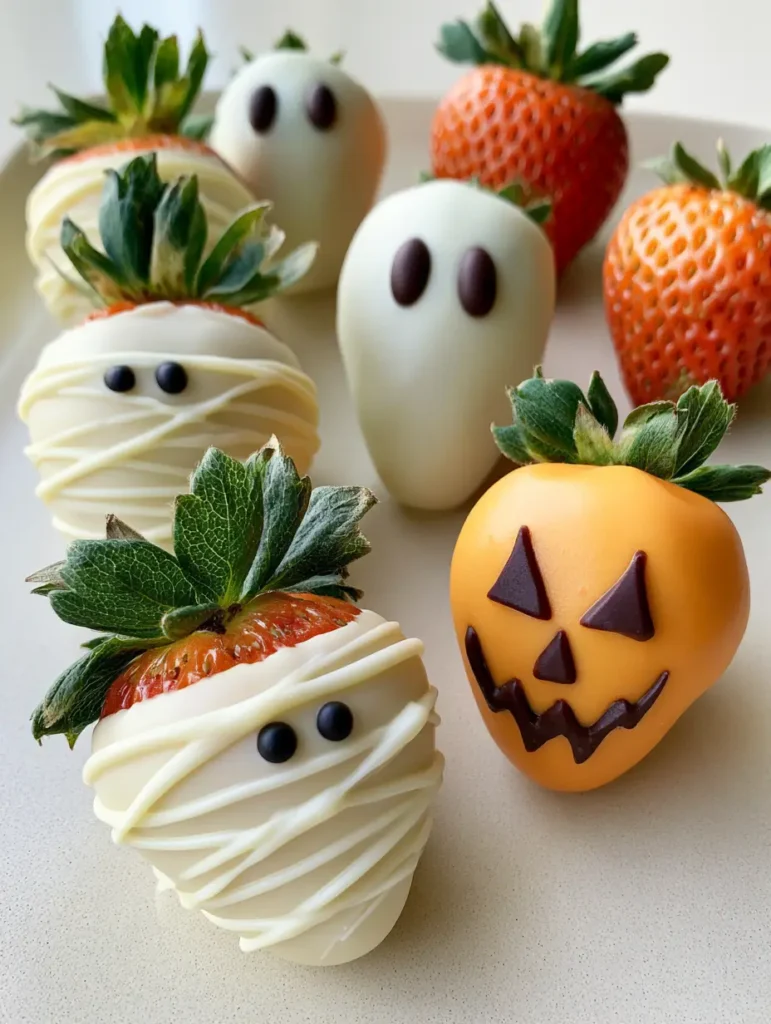
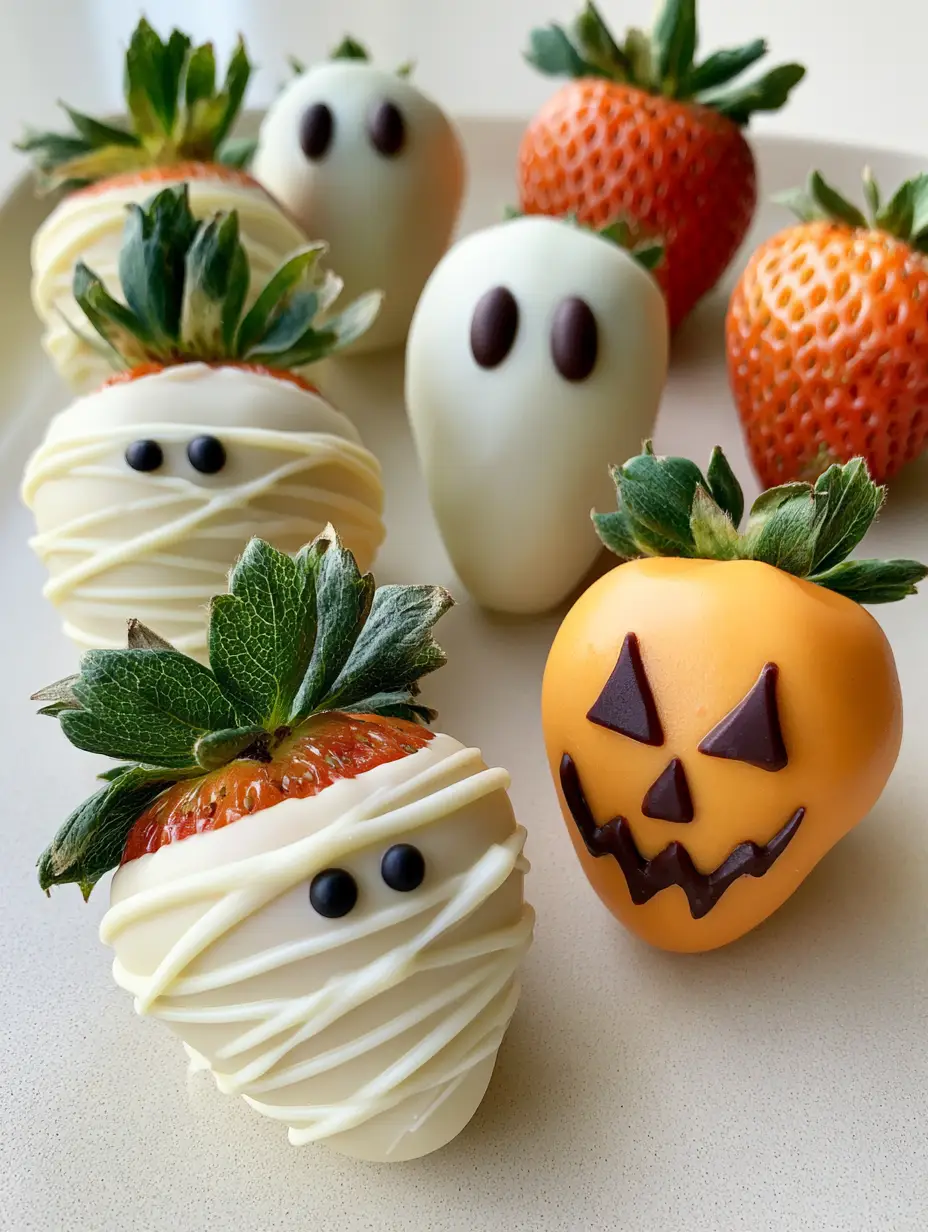
For the mummies, wait for the base white coat to set. Pipe thin, irregular overlapping white chocolate drizzles across the berry to create a “bandage” effect, leaving a small gap to “glue” on two candy eyes. For ghosts, pipe three small oval dots of dark chocolate for the eyes and mouth. For pumpkins, use the dark chocolate to pipe two triangles and a jagged, grinning mouth over the orange base.
Expert Tips for Confectionery Perfection
- Avoid Seizing: Never let a single drop of water enter your chocolate bowls. If you’re using a double boiler, ensure the steam doesn’t escape from under the bowl into the chocolate.
- Room Temp is Key: Ensure your strawberries are at room temperature before dipping. Cold berries can cause “sweating” (condensation) under the chocolate, which leads to a shorter shelf life and possible cracking.
- The Toothpick Trick: If your dark chocolate dots for the ghost faces are too “pointed,” use a toothpick to gently swirl them into perfect ovals before they set.
- Speed and Temperature: If your chocolate starts to thicken in the bowl, microwave it for 5-10 seconds. You want it to be the consistency of heavy cream for the smoothest dip.
Protecting Your Spooky Treats: Storage and Longevity
These Halloween chocolate covered strawberries are best enjoyed the day they are made. Fresh fruit is naturally moist, and eventually, the juices will begin to release. Store them in a cool, dry place in a single layer. If you must refrigerate them, place a paper towel at the bottom of the container to absorb any condensation that occurs as the temperature shifts.
Do not freeze these berries. Freezing destroys the cellular structure of the strawberry, turning it into a mushy mess once thawed. If you have leftovers, they will keep in the refrigerator for up to 24 hours, but the chocolate may lose some of its snappy texture. For the best “snap,” take them out of the fridge 15 minutes before serving to let the chocolate soften just a touch.
What to Serve at Your Haunted Gathering
A tray of these berries is a fantastic centerpiece, but a full party spread needs variety. For a savory balance, consider serving these alongside some crispy fried chicken sliders or even some tender pulled pork sliders. The saltiness of the meat provides a perfect foil to the sweet white chocolate.
If you want to keep the strawberry theme going throughout the meal, our strawberry basil balsamic chicken is an elegant way to incorporate the fruit into a main course. And for the ultimate dessert table, place these berries next to a creamy southern peach cobbler cheesecake for a mix of textures that will keep your guests coming back for more.
If you’re hosting a party with kids, you can even turn the kitchen into a lab. While you pipe the mummy bandages, let them try a lightning in a jar experiment to keep the spooky science vibes flowing throughout the evening!
Commonly Asked Chilling Chocolate Questions
Yes, but chocolate chips contain stabilizers that make them hold their shape. You will likely need to add an extra teaspoon of coconut oil to get a smooth dipping consistency.
After dipping, hold the berry over the bowl and let the excess drip off. Briefly touch the tip of the berry to the surface of the chocolate to ‘wick’ away the last drop before placing it on parchment.
They are best within 8-12 hours. Because the strawberry is fresh, it will eventually start to release moisture, causing the chocolate to pull away after 24 hours.
It is best to store them in a cool, dry room. If you refrigerate them, they may develop ‘sweat’ (condensation) when brought back to room temperature, which makes the chocolate sticky.
Chocolate seizes when even a tiny amount of moisture (water) or the wrong food coloring is added. Always use oil-based coloring and ensure your berries and tools are bone-dry.
The Master Recipe for Halloween Chocolate Covered Strawberries
Halloween Chocolate Covered Strawberries: The Ultimate Spooky Gourmet Trio
Ingredients
Equipment
Method
- Wash strawberries thoroughly and dry each one by hand. Allow to air dry for 30 minutes to ensure no moisture remains.
- Melt white chocolate in 30-second increments in the microwave. Stir in coconut oil until glossy and smooth.
- Dip strawberries into white or orange-tinted chocolate. Place on parchment paper and let set until matte.
- Drizzle white chocolate in zig-zags over a white-dipped berry. Place two candy eyes in the gaps while wet.
- Use a piping bag with dark chocolate to create three ovals for ghosts or triangles and jagged mouths for pumpkins.
Notes
Always use oil-based coloring to prevent chocolate from seizing.
Final Thoughts: Unleash Your Inner Food Artist
Making Halloween chocolate covered strawberries is more than just a recipe; it’s a creative outlet that results in a truly gourmet treat. The contrast of the matte white chocolate bandages against the bright green stems and the playful dark chocolate faces makes these a visual triumph every single time. Don’t be afraid to experiment with the “bandage” patterns—the more irregular the drizzles, the more realistic your mummies will look!
We would love to see your spooky creations! If you make these berries, please leave a comment below and share your photos with us on Pinterest. Happy haunting and even happier snacking!