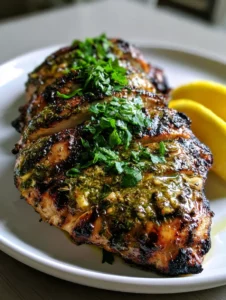
There is something undeniably magnetic about the perfect Fried Chicken Sliders. It is a handheld masterpiece that balances the crunch of a craggy, golden crust with the pillowy softness of a toasted brioche bun.
When you look at a truly great slider, you should see textures that tell a story. You want to see the deep-golden-brown ridges of a heavy breading and the glossy shimmer of a bun that has seen just enough butter and heat.
This recipe was designed to replicate the ultimate “handheld smartphone photo” aesthetic. We are talking about high-contrast textures, vibrant green dill pickles, and that signature pale orange spicy mayo dripping perfectly from the edges.
Whether you are serving these for a weekend game day or a family dinner, these sliders deliver a professional culinary experience. Every bite offers a sensory explosion of heat, tang, and crunch.

Why These Mini Chicken Sandwiches Outshine the Competition
- The Craggy Crunch: Using a specific double-dredge technique ensures a thick, ultra-crispy coating that stays crunchy long after frying.
- The Visual Contrast: We pair deep-golden chicken with bright green ridged pickles and a pale orange sauce for a photogenic, restaurant-quality look.
- Scientific Brining: A buttermilk and hot sauce brine ensures the interior of the chicken remains succulent while the exterior shatters upon impact.
- The Brioche Factor: Choosing toasted brioche provides a rich, buttery sweetness that balances the heat of the spicy mayo perfectly.
The Anatomy of Perfect Fried Chicken Sliders: Ingredients and Logic
Boneless Skinless Chicken Thighs: We use 1.5 lbs (680g) of thighs because they remain juicy under high heat. Cut them into 3-inch pieces to fit the slider buns perfectly.
Buttermilk: 1.5 cups (355ml) of buttermilk acts as a tenderizer. The lactic acid breaks down lean muscle fibers, resulting in a melt-in-your-mouth texture.
All-Purpose Flour and Cornstarch: A 2:1 ratio of flour (2 cups/250g) to cornstarch (1 cup/125g) is the secret to that “craggy” texture. Cornstarch prevents gluten development, making the crust lighter and crispier.
Brioche Slider Buns: These buns contain a high egg and butter content. When toasted, they develop a glossy, golden-brown sheen that provides the structural integrity needed for the sauce.
Spicy Mayo Sauce: A blend of 0.5 cups (120ml) mayonnaise and 2 tbsp (30ml) sriracha. This creates that specific pale orange hue and provides a creamy, cooling heat.
Ridged Dill Pickles: Use high-quality, refrigerated dill chips. The ridges are essential for catching extra sauce and providing a sharp, vinegary snap.
Neutral Frying Oil: 1 quart (946ml) of peanut or canola oil is required. These oils have high smoke points, allowing the chicken to reach a deep-golden-brown without burning.
The Seasoning Suite: 1 tbsp (15g) kosher salt, 1 tsp (5g) black pepper, 2 tsp (10g) smoked paprika, and 1 tsp (5g) garlic powder. These “invisible” ingredients build the flavor profile within the breading.
Essential Gear for the Ultimate Frying Experience
To achieve the visual result seen in professional food photography, you need the right tools. A heavy-bottomed Dutch oven is superior to a standard pan because it maintains a consistent oil temperature.
An instant-read thermometer is your best friend here. You need to monitor the oil to ensure it stays at exactly 350°F (175°C) to prevent the breading from becoming greasy.
Finally, a wire cooling rack set over a baking sheet is mandatory. Never rest fried chicken on paper towels, as the trapped steam will turn your craggy crust soggy within minutes.

The Secret to the Craggy Coating: Step-by-Step Instructions
Phase 1: The Acidic Brine
In a large bowl, whisk together the buttermilk, 1 tbsp (15ml) of hot sauce, and half of your seasoning suite. Submerge the chicken pieces entirely, ensuring every nook is covered.
Allow the chicken to marinate for at least 4 hours, or ideally overnight. This step ensures the chicken is seasoned from the inside out and remains moist during the deep-frying process.
Phase 2: Constructing the Craggy Breaded Exterior
Combine the flour, cornstarch, and the remaining seasonings in a shallow dish. For the “craggy” look, drizzle 2 tbsp (30ml) of the buttermilk brine into the flour mixture and stir with a fork to create small clumps.
Remove a piece of chicken from the brine and press it firmly into the flour. Flip and press again, ensuring the flour clumps adhere to the meat; these clumps become the “crags” when fried.
Phase 3: The Golden-Brown Deep Fry
Heat your oil to 350°F (175°C) in your Dutch oven. Carefully lower 3-4 pieces of chicken into the oil, being careful not to over-crowd the pot, which would drop the temperature.
Fry for 5-7 minutes, turning occasionally. Look for the visual cue: a deep-golden-brown color and an internal temperature of 165°F (74°C). Transfer to the wire rack immediately.
Phase 4: Toasting and Assembly
Split your brioche buns and spread a thin layer of butter on the cut sides. Place them face-down in a hot skillet until they are toasted and glossy with a golden-brown edge.
Apply a generous tablespoon of the pale orange spicy mayo to the bottom bun. Place the warm fried chicken on top, followed by two ridged dill pickles, and finish with the slightly tilted top bun.
Culinary Pro-Tips for Picture-Perfect Sliders
- The “Double Dip”: If you want an even thicker crust, dip the floured chicken back into the buttermilk and then back into the flour a second time.
- Temperature Control: If your oil is too hot, the outside will burn before the inside is cooked. Always use a thermometer.
- Rest the Breading: Let the breaded chicken sit on a tray for 10 minutes before frying. This “sets” the flour and prevents the crust from falling off in the oil.
- Sauce Ratio: Adjust the sriracha in your mayo slowly. You are aiming for a pale orange color, not a deep red, to keep the visual balance.
Managing Your Fried Chicken Sliders: Storage and Reheating
Fried chicken is always best served fresh, but you can store leftovers in an airtight container for up to 3 days. To maintain the crunch, avoid the microwave at all costs.
To reheat, place the chicken pieces in an oven or air fryer at 375°F (190°C) for 4-5 minutes. This will re-crisp the fats in the breading and restore that craggy texture.
The spicy mayo can be made in advance and stored in the refrigerator for up to one week. Keep your buns in their original packaging until the moment you are ready to toast them to prevent drying out.
Perfect Pairings to Complete the Feast
These Fried Chicken Sliders are the star of the show, but they shine even brighter with the right supporting cast. For a classic BBQ feel, serve them alongside a creamy macaroni salad that cuts through the heat.
If you want something lighter and more refreshing, a crisp cucumber salad provides a great textural contrast to the fried breading.
For those hosting a larger slider bar, consider offering these alongside tender pulled pork sliders to give your guests a variety of protein options.
And if you need a side that feels a bit more “gourmet,” a bowl of grinder-style tortellini salad brings a punchy acidity that works beautifully with the spicy mayo.
Common Questions About Frying Chicken Sliders
Yes, though the ‘craggy’ texture won’t be as deep. Air fry at 375°F (190°C) for 12-15 minutes, spraying the breading generously with oil halfway through.
Drop a small cube of bread into the oil; if it turns golden-brown in 45-60 seconds, your oil is roughly 350°F and ready for frying.
Brush the split side of the brioche bun with softened butter and toast in a skillet over medium heat until a golden-brown crust forms.
Chicken thighs are highly recommended for sliders because they are more forgiving and remain juicy during the high-heat deep-frying process.
The secret is adding a few tablespoons of the liquid buttermilk brine into the dry flour mix to create small clumps before dredging the chicken.
The Ultimate Fried Chicken Sliders Recipe

Fried Chicken Sliders with Spicy Mayo and Ridged Dill Pickles
Ingredients
Equipment
Method
- Whisk buttermilk, hot sauce, and half the spices. Submerge chicken and marinate for at least 4 hours.
- Mix flour, cornstarch, and remaining spices. Drizzle 2 tbsp of brine into the flour to create craggy clumps.
- Press chicken pieces into the flour mixture, ensuring clumps adhere to the surface.
- Deep fry at 350°F (175°C) for 5-7 minutes until deep-golden-brown and craggy.
- Toast buns, apply spicy mayo to the bottom, add chicken and two ridged pickles. Top with the tilted bun.
Notes
Ensure the oil returns to 350°F between batches.

Join the Community and Share Your Creations!
Making these Fried Chicken Sliders is more than just a meal; it’s a culinary win that everyone at the table will remember. The combination of the craggy crust and the sweet brioche is truly world-class.
If you enjoyed this recipe, please leave a comment below and let us know how your “crags” turned out! Don’t forget to follow us on Pinterest for more visual recipe inspiration and kitchen tips.
Sign up for our newsletter to get weekly recipes delivered straight to your inbox, and share your slider photos with us on social media using our hashtag!