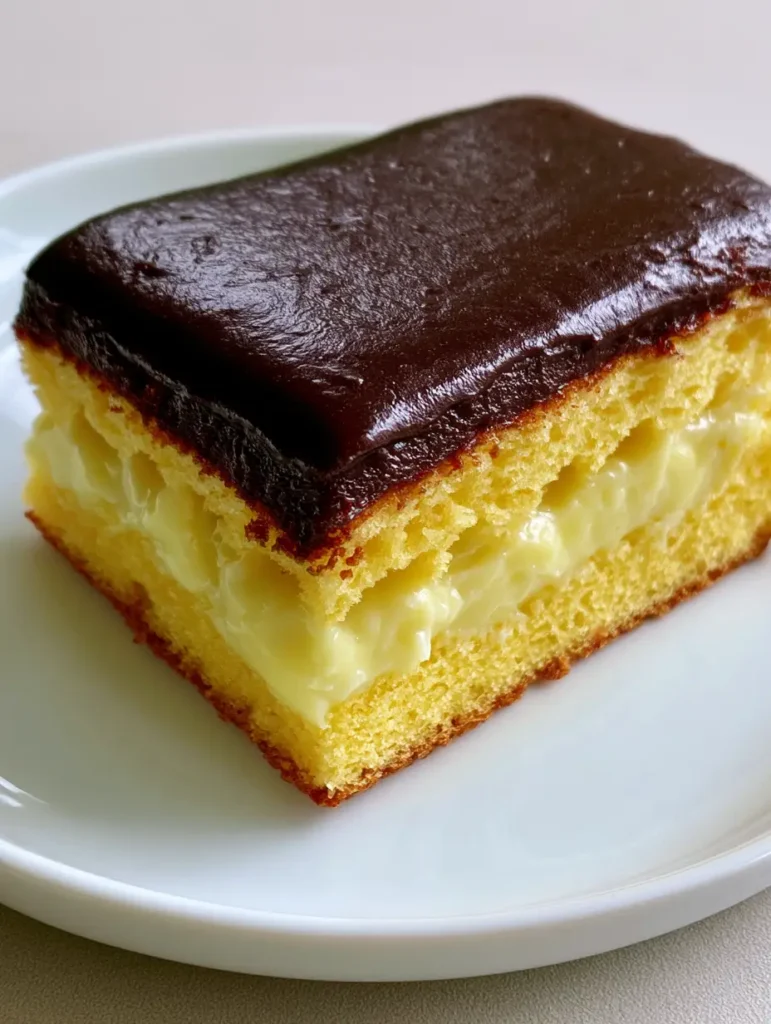
The Boston Cream Pie Poke Cake is a modern, decadent twist on a Massachusetts classic that dates back to the mid-19th century. By combining a light, airy sponge with the saturated moisture of a poke cake, we elevate the traditional dessert into something far more indulgent. This version focuses on the contrast between the golden-yellow crumb and the deep, rich pools of vanilla cream.
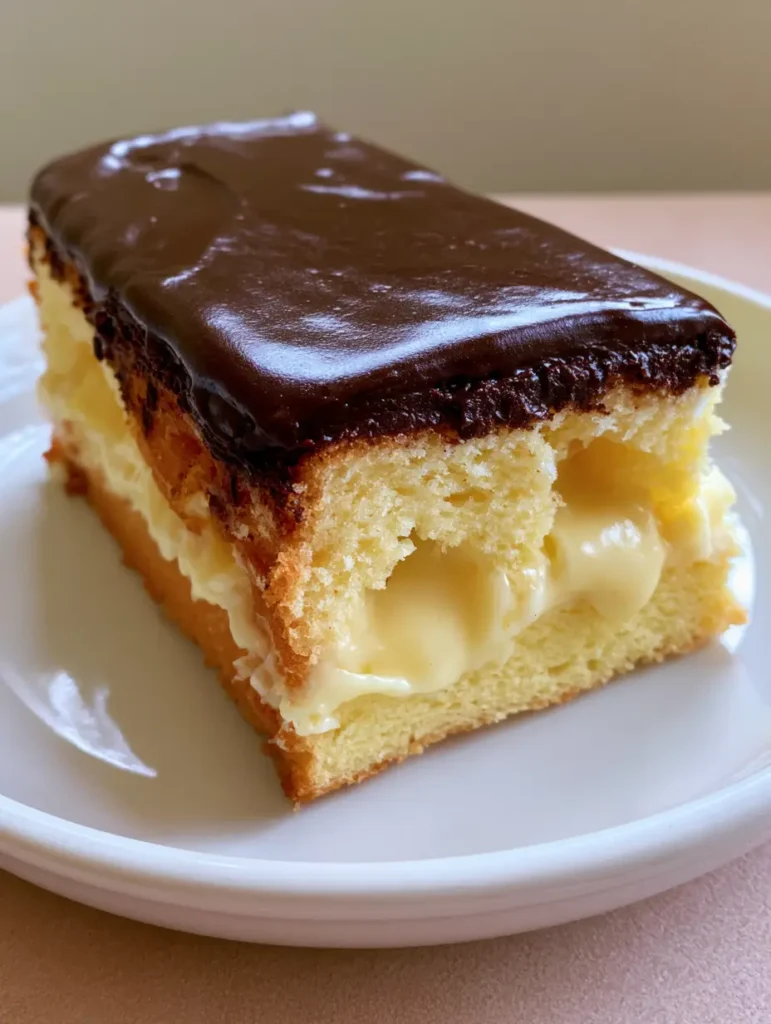
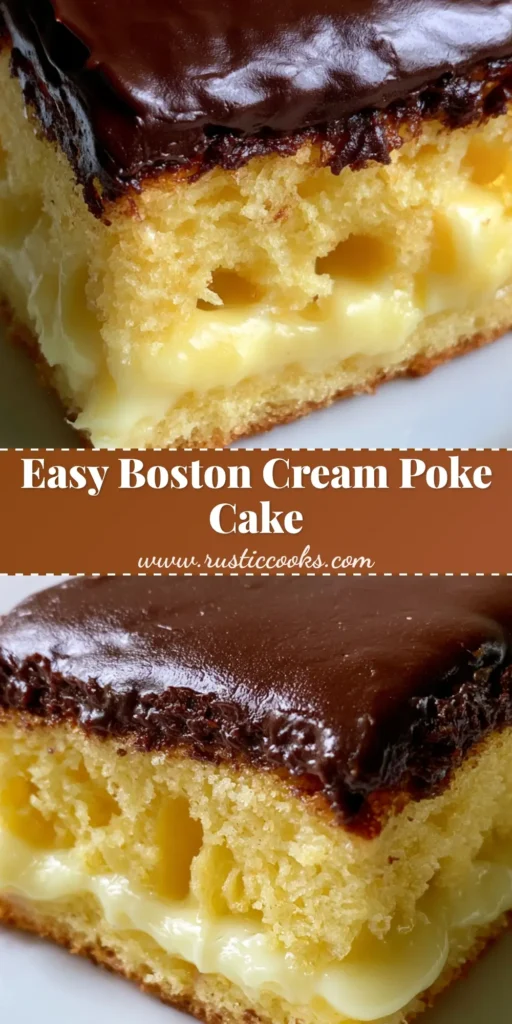
Imagine a handheld smartphone photo of a rectangular slice sitting elegantly on a simple white ceramic plate. The soft natural daylight catches the mirror-like finish of the dark chocolate ganache, while the vertical pudding-filled tunnels create a striking visual pattern. This recipe is designed to replicate that exact professional aesthetic right in your home kitchen.
Whether you are hosting a summer barbecue or looking for a show-stopping Sunday night treat, this cake delivers. It offers the nostalgia of a traditional custard-filled cake but with the foolproof consistency of a poke method. The result is a dessert that is consistently moist, visually stunning, and remarkably easy to slice.
Why This Reimagined Classic Is a Total Game Changer
- Unmatched Moisture Profile: Unlike traditional dry sponge cakes, the “poke” method ensures that thick, opaque pale-yellow vanilla pudding reaches every single bite.
- The Mirror-Finish Ganache: We use a specific ratio of heavy cream to dark chocolate to achieve a smooth, glossy surface that reflects light beautifully.
- Textural Harmony: You get the structural integrity of a golden-yellow baked sponge paired with the creamy, velvet-like texture of a cooked custard.
- Visual Perfection: The contrast of the dark chocolate against the yellow cake and pale pudding makes for a stunning presentation on a white ceramic plate.
Essential Components for the Perfect Yellow Sponge Foundation
To achieve the “moist baked yellow sponge cake” described in our blueprint, we need a balance of fats and leavening agents. 2 cups (250g) all-purpose flour provides the essential structure needed to hold the weight of the pudding without collapsing.
1 ½ cups (300g) granulated sugar not only sweetens the base but also helps in the browning process to get that golden-yellow hue. Using 1/2 cup (115g) unsalted butter at room temperature ensures a rich, buttery mouthfeel that mimics a high-end bakery sponge.
For the “invisible” science, we include 1 tbsp (15g) baking powder and 1/2 tsp (3g) salt. These ensure the cake rises evenly, creating the perfect canvas for our vertical pudding holes. 1 cup (240ml) whole milk and 3 large eggs provide the liquid gold necessary for that iconic yellow color.
If you enjoy experimenting with different textures in your desserts, you might find the contrast in our Southern Peach Cobbler Cheesecake just as delightful. Both recipes rely on a solid foundation of high-quality dairy and precise temperature control.
The Secret to Thick Opaque Vanilla Pudding Filling
The visual blueprint requires “thick, opaque pale-yellow vanilla pudding.” To achieve this, we avoid thin, watery instant mixes and instead opt for a reinforced custard approach. 2 packages (3.4 oz each) of instant vanilla pudding mix combined with only 3 cups (720ml) cold whole milk creates a denser, more stable filling.
Adding 1 tsp (5ml) pure vanilla extract enhances the aromatic profile, while a tiny pinch of turmeric (optional) can deepen that pale-yellow color seen in our reference photo. This thickness is crucial so the pudding doesn’t simply soak into the cake but stays as distinct, visible vertical pockets.
The technique of “poking” is where the magic happens. Use the end of a round wooden spoon to create holes approximately 1 inch apart. This ensures the pudding forms those “vertical holes” mentioned in the Midjourney prompt, providing a beautiful cross-section when sliced into rectangular pieces.
Achieving the Glossy Dark Chocolate Ganache Finish
The crowning glory of the Boston Cream Pie Poke Cake is the “glossy melted chocolate ganache.” To get that smartphone-photo-ready shine, we use 1 cup (175g) high-quality dark chocolate chips or chopped semi-sweet chocolate. This provides the “dark” contrast necessary for the visual blueprint.
3/4 cup (180ml) heavy whipping cream is heated until just simmering—never boiling—to prevent the chocolate from seizing. A secret for the shine is adding 1 tbsp (15ml) light corn syrup or a pat of butter, which creates that reflective, smooth-as-glass surface.
Pouring the ganache while it is still warm but slightly thickened allows it to level itself across the top of the chilled pudding layer. This creates the “perfectly smooth” finish that looks so appetizing under soft natural daylight. If you appreciate the science of “shiny” coatings, check out our Lightning in a Jar experiment for a different kind of visual glow.
Professional Tools for Bakery-Style Results
While this is a home-cooked dessert, using the right equipment ensures the “rectangular slice” maintains its shape. A 9×13 inch (23×33 cm) glass or ceramic baking dish is standard, allowing for even heat distribution and easy storage.
You will need a wooden spoon with a rounded handle to create the holes. A silicone spatula is essential for folding the batter and scraping the ganache bowl to ensure no chocolate is wasted. For the final presentation, a sharp chef’s knife dipped in hot water between cuts will give you those clean, vertical edges visible on the white ceramic plate.
Step-by-Step Evolution of the Poke Cake
Baking the Golden-Yellow Sponge
Preheat your oven to 350°F (175°C). Cream the butter and sugar together until light and fluffy, which takes about 3-4 minutes of high-speed mixing. This aeration is what makes the cake “moist” yet sturdy enough for the pudding filling.
Incorporate the eggs one at a time, followed by the dry ingredients and milk in alternating batches. Spread the batter evenly into your greased pan and bake for 25-30 minutes. Look for the visual cue of the edges pulling away slightly from the sides of the pan and a toothpick coming out clean.
The Art of the “Poke” and Pudding Infusion
Allow the cake to cool for at least 15 minutes before poking. If the cake is too hot, the pudding will melt into the crumb; if it’s too cold, it won’t settle into the holes. Use the handle of your wooden spoon to poke holes across the entire surface, going about 3/4 of the way down.
Whisk your pudding mix with the cold milk for exactly 2 minutes until it begins to thicken. Quickly pour it over the cake, using an offset spatula to nudge the thick, pale-yellow custard into the holes. This step creates the “pudding pockets” that are the hallmark of this recipe.
Mastering the Ganache Overlay
Heat your heavy cream in a small saucepan over medium heat. As soon as you see small bubbles forming at the edges, pour it over your chocolate chips in a heat-proof bowl. Let it sit undisturbed for 5 minutes—this is the secret to a smooth, lump-free ganache.
Gently whisk from the center outward until the mixture transforms into a glossy, dark liquid. Pour this over the pudding layer immediately. Refrigerate the entire cake for at least 4 hours, or ideally overnight. This “cure time” allows the flavors to meld and the ganache to set into that perfectly smooth layer.
Expert Tips for Visual and Flavor Success
- Wipe Your Knife: To get the “rectangular slice” look from the photo, wipe your knife clean with a damp cloth after every single cut. This prevents the dark ganache from smearing into the pale yellow pudding.
- Temperature Control: Ensure your eggs and milk are at room temperature before baking the sponge to avoid a curdled batter, which ruins the “moist yellow” texture.
- Avoid Over-Mixing: Once you add the flour, mix only until combined. Over-mixing develops gluten, which makes the cake tough rather than the “soft sponge” we are aiming for.
- The “Tap” Method: After pouring the pudding, gently tap the baking dish on the counter. This helps the “thick, opaque” pudding settle deep into the vertical holes, removing air bubbles.
Serving Suggestions for Your Dessert Masterpiece
This cake is best served chilled, straight from the refrigerator. The contrast between the cold, creamy pudding and the firm chocolate ganache is a sensory delight. Place a single rectangular slice on a white ceramic plate and serve with a silver fork to match our visual blueprint.
If you are serving this at a larger gathering, it pairs beautifully after a savory meal. Consider starting with Old Bay Crab Cakes or perhaps some hearty Pulled Pork Sliders. The sweetness of the Boston Cream Pie Poke Cake acts as a perfect palate cleanser after rich, savory flavors.
For a lighter accompaniment, a side of fresh berries or a dollop of unsweetened whipped cream can provide a nice acidic or airy contrast to the dense, rich ganache. If you’re planning a full menu, this cake is also a great follow-up to a fresh Cucumber Beetroot Salad.
Storage and Make-Ahead Instructions
This is the ultimate make-ahead dessert. In fact, it actually improves after 24 hours in the fridge as the pudding further hydrates the sponge. Keep the cake covered with plastic wrap or a lid to prevent the chocolate from absorbing any refrigerator odors.
The cake will stay fresh and moist for up to 4 days when refrigerated. We do not recommend freezing this specific recipe, as the texture of the vanilla pudding can become grainy and the ganache may lose its characteristic “glossy” shine upon thawing.
Frequently Asked Questions
Yes, a standard yellow cake mix works perfectly. Simply follow the package directions and proceed with the poking and pudding steps once baked.
You can, but the result will be much sweeter and lighter in color. Dark chocolate provides the best visual contrast and a more sophisticated flavor profile.
Adding a tablespoon of light corn syrup or a small amount of butter to the hot cream and chocolate helps maintain that mirror-like shine even when cold.
Wait about 15-20 minutes. If the cake is too hot, it will become gummy; if it is too cold, the pudding won’t adhere to the crumb as well.
If the pudding is too thick, it won’t settle. Make sure to pour the pudding immediately after whisking before it fully sets, and use a spatula to press it into the holes.
The Ultimate Boston Cream Pie Poke Cake Recipe
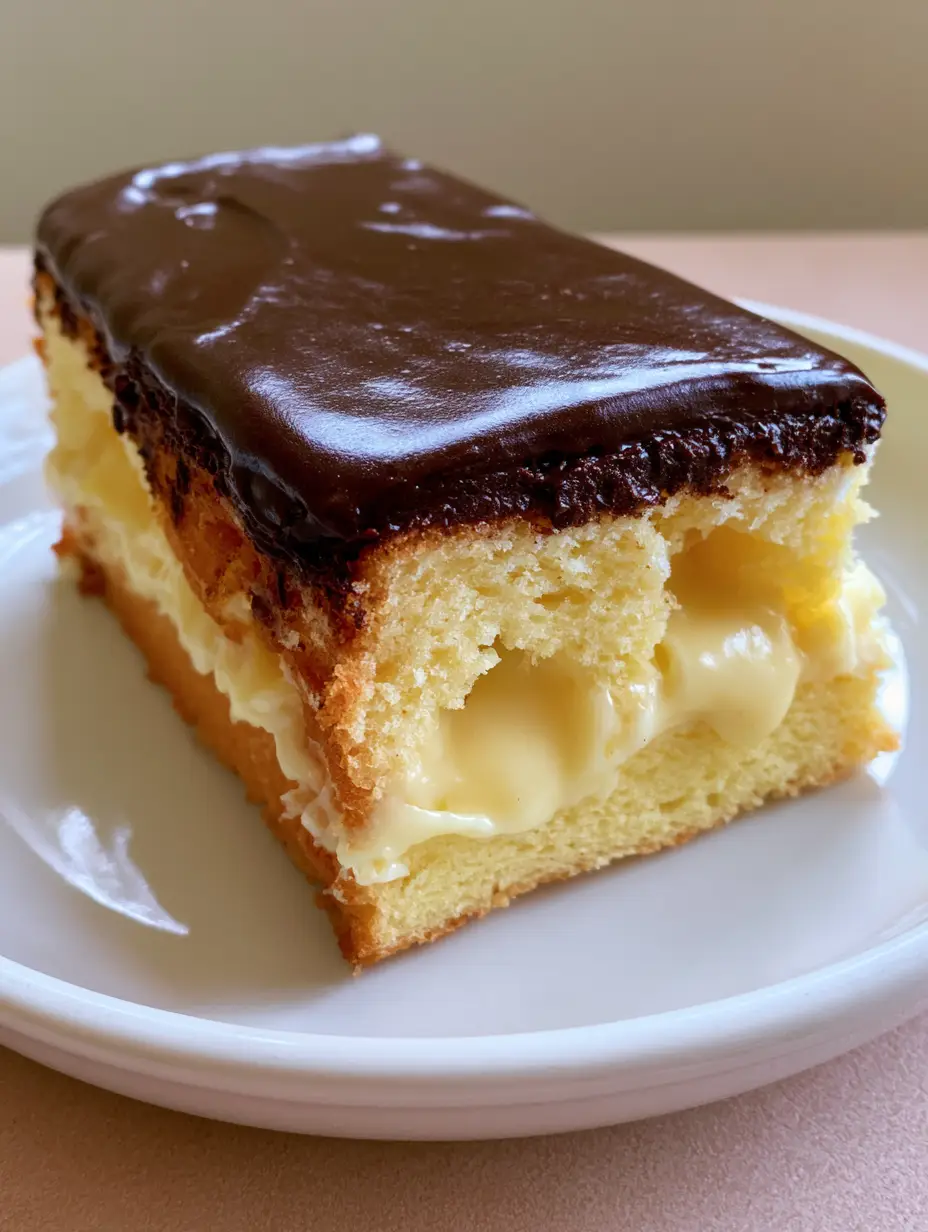
Boston Cream Pie Poke Cake: The Ultimate Moist Vanilla and Chocolate Fusion
Ingredients
Equipment
Method
- Cream butter and sugar until fluffy. Add eggs one at a time.
- Mix in dry ingredients and milk. Bake at 350°F (175°C) for 25-30 minutes.
- Use a wooden spoon handle to poke holes 1 inch apart in the cooled cake.
- Whisk pudding and milk for 2 mins, then pour over cake, filling the holes.
- Heat cream and pour over chocolate. Whisk until glossy and smooth.
- Pour over cake and refrigerate for at least 4 hours before slicing.
Notes
For a deeper yellow pudding, add a tiny pinch of turmeric to the mix.
Bringing the Bakery Home
There is something deeply satisfying about slicing into a cake to reveal those perfect pudding-filled tunnels. The Boston Cream Pie Poke Cake isn’t just a dessert; it’s a visual and culinary experience that combines the best of traditional baking with modern, easy-to-execute techniques.
We hope you enjoy making (and eating!) this glossy, creamy masterpiece. If you found this recipe helpful, please leave a comment below and share your results! Don’t forget to follow us on Pinterest for more visually-driven recipe inspiration. Happy baking!
For more flavor-packed ideas, don’t miss our secret Cowboy Butter Recipe, which is perfect for your next steak night!