The Dill Pickle Ranch Chicken Tacos are the ultimate flavor collision for anyone who craves the salty, tangy zip of a deli pickle combined with the indulgent crunch of a griddled smash burger. This isn’t your average street taco; it is a masterclass in texture, featuring a juicy chicken patty fused to a “cheese skirt” so crispy it shatters with every bite.
Inspired by the viral smash burger trend, these tacos trade beef for lean ground chicken and elevate the experience with a heavy zigzag of creamy ranch and the sharp bite of crinkle-cut dill pickles. If you have ever enjoyed a zesty ranch-infused chicken dish, you already know how perfectly these flavors harmonize.
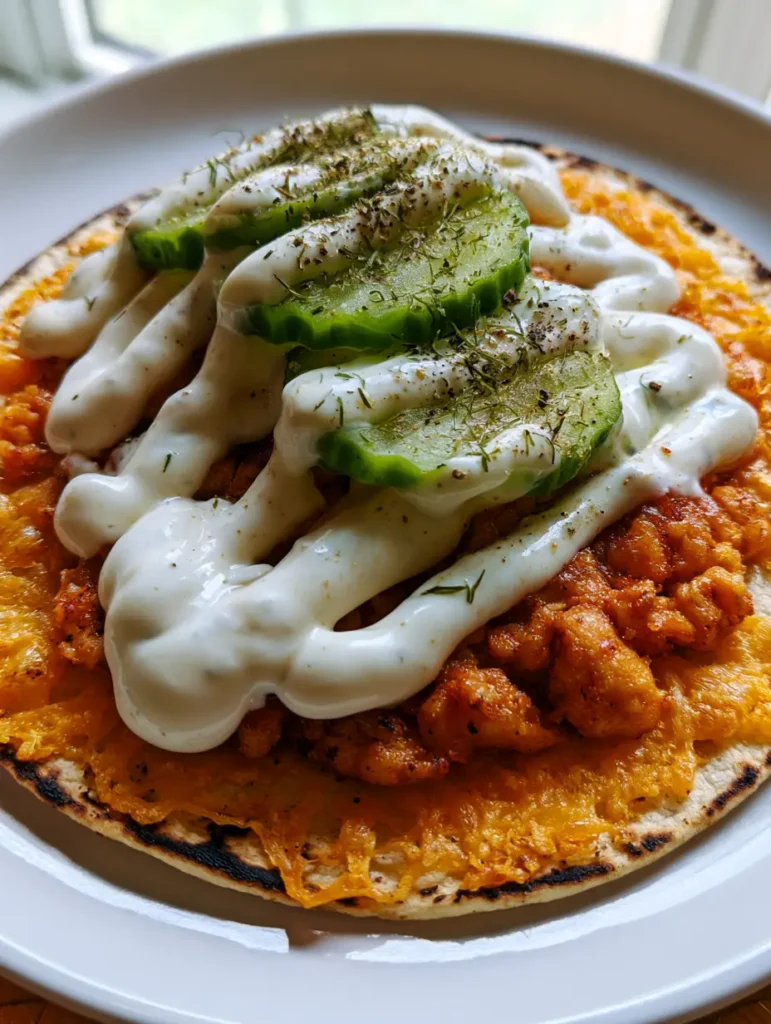
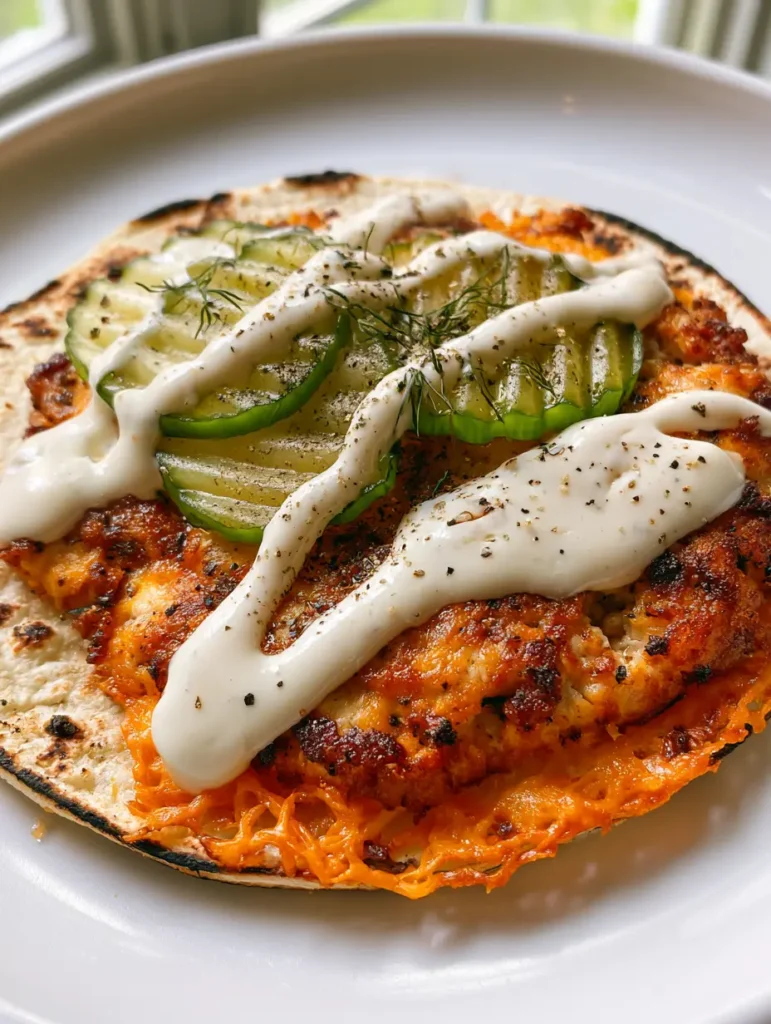
The visual appeal is undeniable: a charred flour tortilla cradling a golden-brown patty, all framed by a wide, lacy orange cheddar border that looks as good as it tastes. Whether you are looking for a quick weeknight upgrade or a show-stopping weekend lunch, these tacos deliver a sensory experience that hits every note from creamy to crunchy.
Why You Will Crave These Smashed Poultry Tacos
- The Ultimate Cheese Skirt: We use a specific searing technique to create a wide, thin, lacy skirt of fried cheddar cheese that extends far beyond the tortilla edge.
- Bold Tangy Profile: Between the brined pickles, the dried dill weed, and the buttermilk-based ranch, every bite is a tribute to the “pickle-obsessed” palate.
- Perfectly Charred Base: Using a flour tortilla instead of corn allows for a soft, pillowy contrast to the intensely crispy smashed chicken patty.
- Balanced Textures: You get the snap of cold pickles, the creaminess of the dressing, and the satisfying “crunch” of the cheese lace in one handheld bite.
The Tangy Components of These Smash Tacos
To achieve the specific result seen in our visual blueprint, you need high-quality ingredients that can stand up to the high heat of a cast-iron skillet. Each component plays a vital role in the structural integrity and flavor profile of the dish.
Ground Chicken: 1 lb (454g) of ground chicken serves as our protein base. Unlike beef, ground chicken requires a generous hand with seasoning to truly shine, so do not skip the salt and pepper.
Sharp Cheddar Cheese: 2 cups (226g) of freshly shredded sharp cheddar are essential for the “lace” effect. Avoid pre-shredded bags; the cellulose coating prevents the cheese from melting into that signature thin, crispy skirt.
Small Flour Tortillas: 8-10 street-taco-sized (approx. 4.5 inches/11cm) flour tortillas provide the perfect flexible vessel. Their high sugar content allows them to char beautifully against the hot griddle.
Crinkle-Cut Dill Pickles: You will need about 30 thin slices (approx. 3 per taco). Opt for the refrigerated variety to ensure they stay “bright green” and maintain a satisfying snap against the warm meat.
Ranch Dressing: 1/2 cup (120ml) of thick, premium ranch dressing provides the creamy zigzag. A thicker consistency is better here so it doesn’t immediately soak into the charred tortilla.
Avocado Oil: 2 tbsp (30ml) of a high-smoke-point oil is necessary for the initial sear. This ensures the chicken develops a deep golden-brown crust without the oil burning or smoking out your kitchen.
Seasoning Trio: 1 tsp (2g) dried dill weed, 1 tsp (6g) kosher salt, and 1 tsp (2g) freshly cracked black pepper. The dried dill is crucial for that “dusted” visual finish and a concentrated herbal punch.
Essential Tools for the Perfect Smash
Achieving a professional-grade smash requires more than just a spatula; you need tools that can handle intense pressure and high heat. This isn’t unlike the precision needed for a Mexican-style chicken sandwich where texture is everything.
A heavy-duty cast-iron skillet or a flat-top griddle is non-negotiable for the heat retention required for a crispy cheese lace. You will also need a “meat smasher” or a heavy, flat-bottomed grill press. If you don’t have one, a sturdy metal spatula reinforced with a second heavy pan will work to flatten the chicken into that thin, uniform patty.
Mastering the Crispy Cheddar Cheese Skirt
Prepping the Chicken and Heat
Divide your ground chicken into 8-10 small balls, roughly 2 oz (57g) each. Preheat your cast-iron skillet over medium-high heat until a drop of water flicked onto the surface dances and evaporates instantly. Add a thin coat of avocado oil, swirling to cover the entire surface.
The Smash and Tortilla Fusion
Place a chicken ball in the center of the hot pan and immediately place a flour tortilla directly on top of the meat. Using your press or spatula, apply firm, even pressure to the tortilla, smashing the chicken underneath into a very thin, wide patty. Hold for 10 seconds to ensure the meat adheres to the tortilla.
Developing the Golden-Brown Crust
Sear the chicken for 3-4 minutes without moving it. You are looking for a visual cue: the edges of the chicken should look opaque and slightly browned. Use a thin metal spatula to flip the entire taco so the tortilla is now touching the pan and the chicken patty is facing up.
Creating the Lacy Cheese Skirt
Immediately sprinkle a generous handful of shredded cheddar around the edges of the taco, allowing the cheese to spill off the meat and onto the hot pan surface. As the cheese melts, it will bubble and spread into a thin “skirt.” Wait about 60-90 seconds until the cheese stops bubbling vigorously and turns into a lacy, golden-brown fringe.
The Zigzag Finishing Touches
Remove the taco from the pan and place it on a white ceramic plate. The cheese skirt will firm up instantly as it hits the air. Top with three crinkle-cut pickles, a heavy zigzag drizzle of ranch dressing, and a dusting of dried dill and cracked black pepper.
Expert Tips for Success
- Cold Meat is Key: Keep your ground chicken in the fridge until the very moment you are ready to smash. Cold fat hitting a hot pan results in a better sear.
- The “Lace” Logic: If your cheese is just a gooey puddle, you didn’t leave it in the pan long enough. It must go past the “melted” stage until the oils separate and the proteins crisp up into a solid “lace.”
- Don’t Overcrowd: Cook only 1 or 2 tacos at a time. If you put too many in the pan, the temperature drops, and you will steam the meat instead of searing it.
- Tortilla Selection: If your tortillas are tearing, they might be too dry. Microwave them for 10 seconds under a damp paper towel before the “smash” phase to make them more pliable.
Storage, Reheating, and Make-Ahead Advice
These tacos are best enjoyed immediately to preserve the “shatter” of the cheese skirt. However, if you have leftovers, store the smashed chicken and tortilla bases separately from the toppings in an airtight container for up to 2 days.
To reheat and restore the crunch, avoid the microwave. Place the tacos back in a dry skillet over medium heat, chicken side down first for 1 minute, then flip to the tortilla side until warmed through. Re-apply the ranch and pickles fresh before serving.
What to Serve With Smash Tacos
These tacos are incredibly savory and rich, so they pair best with bright, acidic, or starchy sides. A simple cilantro lime slaw or a side of quick weeknight quesadillas can turn this into a full Mexican-inspired feast.
If you are looking for more chicken inspiration, consider pairing these with a side of street corn (elote) or even a small bowl of zesty rice and beans to round out the meal.
Frequently Asked Questions
You can, but flour tortillas are more pliable and adhere better to the raw chicken during the ‘smash’ phase. If using corn, warm them slightly first to prevent cracking.
Yes, ground turkey works perfectly as a lean substitute. Ensure you use a 93/7 blend to maintain enough moisture for a juicy smash.
Use a well-seasoned cast-iron skillet or a high-quality non-stick pan. Wait until the cheese is fully crisped and lacy before attempting to lift it; it will release naturally when done.
A thick, refrigerated buttermilk ranch is best. It provides a better visual ‘zigzag’ and won’t make the tortilla soggy as quickly as thinner shelf-stable versions.
You likely used pre-shredded cheese. Pre-shredded varieties contain anti-caking agents like potato starch that prevent the cheese from flowing and crisping into a lacy structure.
The Ultimate Dill Pickle Ranch Chicken Tacos Recipe
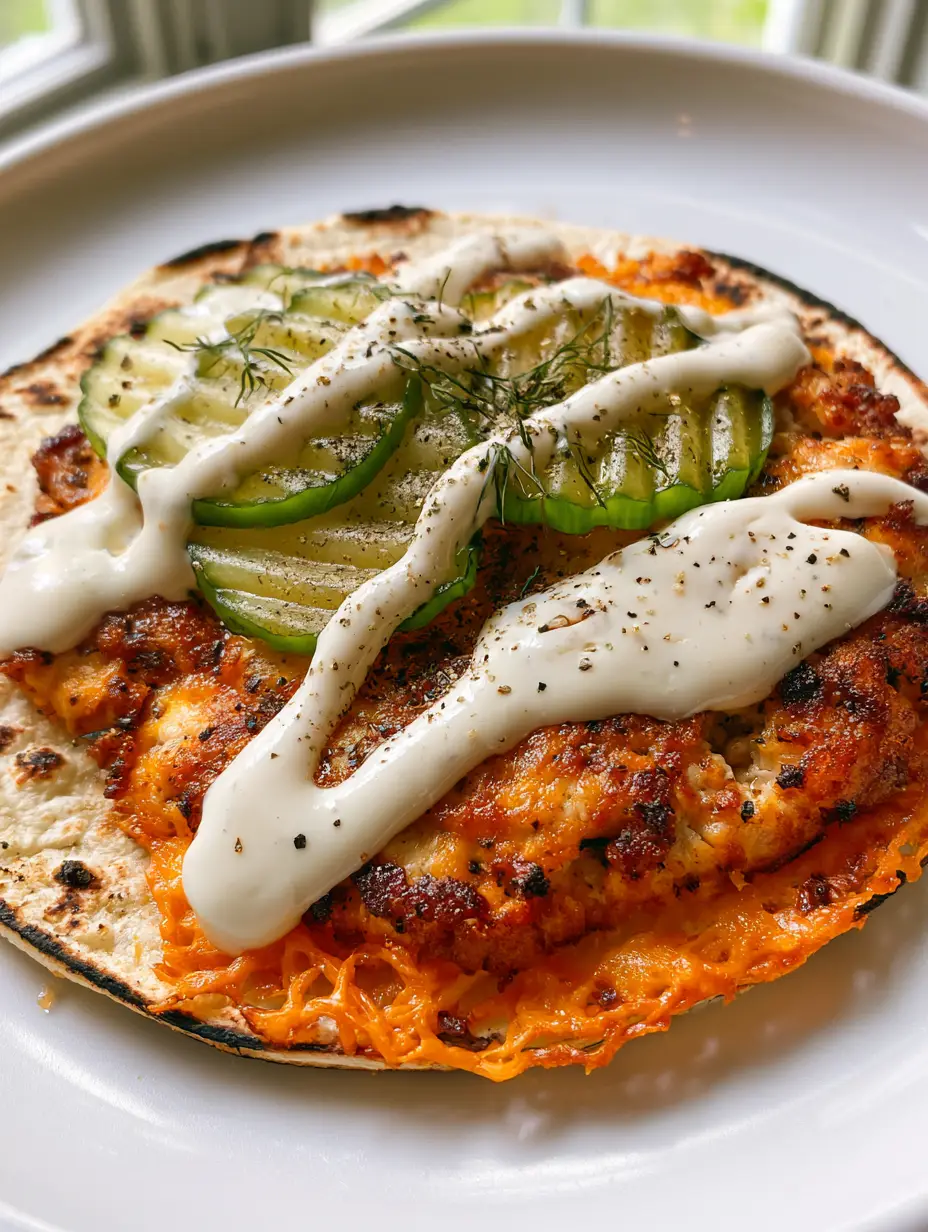
Dill Pickle Ranch Chicken Tacos with Crispy Cheddar Cheese Lace
Ingredients
Equipment
Method
- Divide the 1 lb (454g) ground chicken into 8-10 equal balls. Keep them cold until ready to use.
- Heat 2 tbsp (30ml) avocado oil in a cast-iron skillet over medium-high heat until shimmering.
- Place a chicken ball in the pan, top with a flour tortilla, and smash flat with a press for 10 seconds.
- Cook for 3-4 minutes until the meat is golden-brown. Flip the taco so the chicken faces up.
- Sprinkle 1/4 cup (28g) shredded cheddar around the edges of the taco. Let bubble for 90 seconds until a lacy skirt forms.
- Remove to a plate. Top with 3 pickles, a zigzag of ranch, dried dill, and extra black pepper.
Notes
Ensure the pan is screaming hot before adding the chicken to prevent sticking.
Join the Rustic Cooks Community
We hope these Dill Pickle Ranch Chicken Tacos become a staple in your weeknight rotation! There is nothing quite like the satisfaction of that first crispy, cheesy bite. If you made this recipe, please leave a comment below and let us know how your “cheese skirt” turned out!
For more visual inspiration and daily recipe updates, follow us on Pinterest and share your creations with our community. Don’t forget to sign up for our newsletter to get the latest culinary blueprints delivered straight to your inbox!