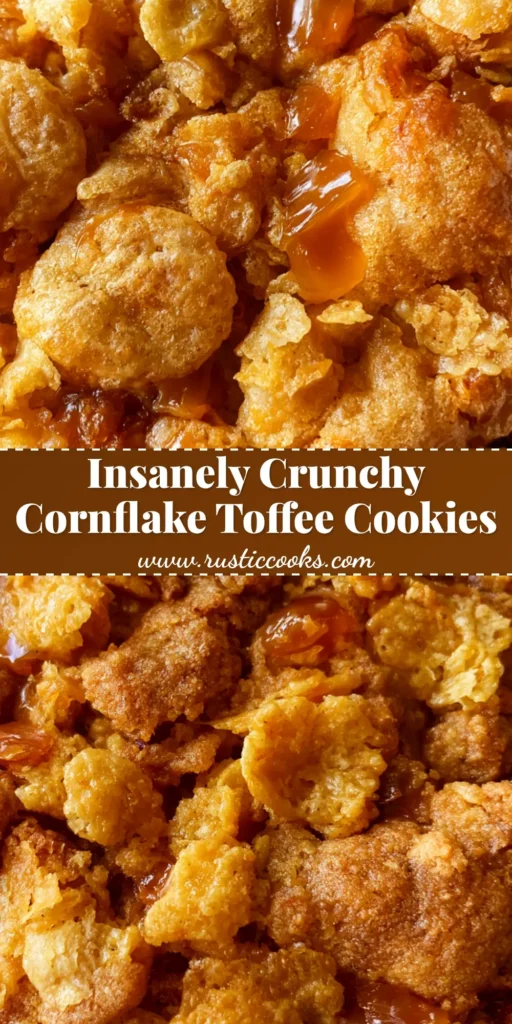
There is something inherently nostalgic about the shatter-crisp crunch of breakfast cereal paired with the deep, buttery indulgence of a home-baked cookie. These Cornflake Toffee Cookies are not your average bakery find; they are a masterclass in texture, featuring a rugged, craggy surface that looks as incredible as it tastes. If you have ever scrolled through social media and paused at a handheld smartphone photo of a thick, rustic cookie with glistening shards of amber, this is that exact recipe.
The magic of these Cornflake Toffee Cookies lies in the contrast between the matte, toasted cornflake cereal and the sticky-sweet, melted toffee bits. Every bite offers a symphony of sounds—from the initial “snap” of the cereal to the chewy, caramelized sugar edges that provide a sophisticated depth of flavor. Whether you are a seasoned baker or a weekend hobbyist, this recipe delivers a professional, “unedited” aesthetic that is naturally beautiful.
In this guide, we are going to break down the culinary science behind the perfect “crinkled” texture and how to achieve that golden-brown finish. We will also explore how to ensure your toffee doesn’t just disappear into the dough but instead forms those iconic glistening shards. Get ready to elevate your cookie game to elite status.
Why You Will Obsess Over These Crunchy Toffee Treats
- The Ultimate Texture Play: You get a combination of whole and crushed cornflakes, creating a rugged surface that provides a massive crunch in every mouthful.
- Caramelized Complexity: High-quality brown sugar and specific baking temperatures ensure the edges are slightly darker and crisp, while the center remains chunky and golden.
- Perfectly Balanced Flavor: The saltiness of the cornflakes cuts right through the sweet amber toffee, making it impossible to stop at just one.
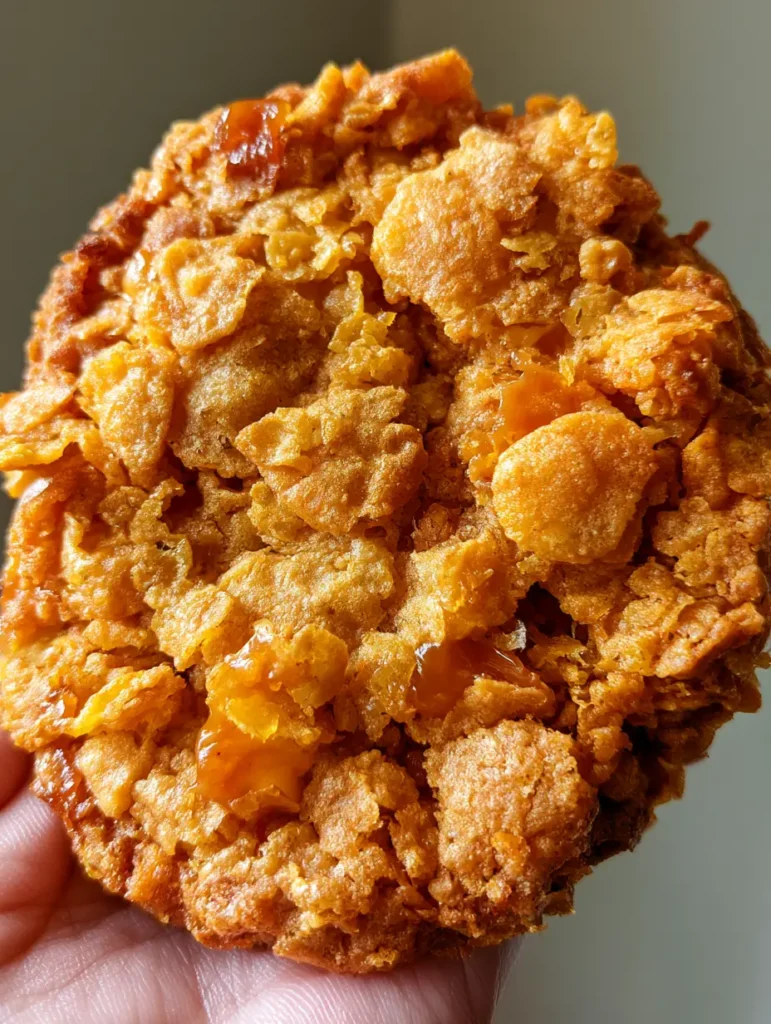
- Visual Appeal: These cookies look exactly like an authentic, handheld mobile photo—rustic, thick, and glistening with melted sugar.
- Versatility: They are rugged enough for a lunchbox but sophisticated enough to serve alongside creamy cannoli bars at your next dessert party.
The Essential Components for a Rustic Cornflake Toffee Cookie
Creating a cookie with this much structural integrity requires more than just mixing ingredients; it requires understanding the “why” behind each addition. To achieve the thick, craggy look from our visual blueprint, we need a specific ratio of fats to dry inclusions.
Unsalted Butter (1 cup / 225g): We use softened, room-temperature butter to ensure a proper emulsion with the sugars. This provides the foundational richness and helps the edges achieve that signature caramelized sugar look.
Granulated White Sugar (3/4 cup / 150g): This is the key to the “snap.” White sugar helps the cookies spread just enough to thin out the edges, allowing them to brown and crisp up in the oven’s heat.
Packed Light Brown Sugar (3/4 cup / 150g): Brown sugar introduces molasses, which is essential for the chewy center and the deep golden-brown cookie dough color seen in our visual blueprint.
Large Egg (1 unit): The egg acts as the primary binder, providing the moisture needed to hydrate the flour while adding protein for structure. Ensure it is at room temperature for seamless integration.
Pure Vanilla Extract (1 tbsp / 15ml): Vanilla doesn’t just add flavor; it enhances the perception of sweetness in the toffee and the toasted notes of the cornflakes.
All-Purpose Flour (2 cups / 250g): This provides the “bones” of the cookie. We use a moderate amount to keep the cookie “thick and rustic” rather than thin and greasy.
Baking Soda (1 tsp / 5g): This leavening agent reacts with the acidic brown sugar to create carbon dioxide bubbles, which gives the cookie its chunky, craggy height.
Sea Salt (1/2 tsp / 3g): Salt is non-negotiable here. It sharpens the flavor of the melted toffee bits and prevents the cereal from tasting one-dimensional.
Plain Cornflake Cereal (3 cups / 120g): The star of the show. We will use a mix of whole and crushed pieces to create the “matte cereal” texture against the “glistening shards” of toffee.
Toffee Bits or Shards (1 cup / 150g): Use high-quality butter toffee bits (like Heath or Skor). These will melt during baking to create those amber, sticky-sweet pockets visible on the surface.
Professional Tools for the Perfect Bake
While the ingredients do the heavy lifting, these tools help you achieve the visual precision of a professional food photographer. You don’t need a commercial kitchen, but a few specific items make a world of difference.
First, a large cookie scoop (3 tbsp capacity) is vital. This ensures every cookie is uniform in size, which allows them to bake evenly so you don’t end up with some burnt edges and other raw centers. The scoop also helps maintain that “rugged” look; don’t smooth the tops after scooping!
Next, use heavy-gauge aluminum baking sheets lined with parchment paper. This prevents the melted toffee from sticking to the pan and ensures the bottom of the cookie browns without scorching. If you like experimenting with cereal in bakes, you might also enjoy making crunchy cereal-based treats using similar techniques.
How to Construct the Ultimate Cornflake Toffee Cookies
Achieving the Perfect Creamy Base
In a large stand mixer fitted with the paddle attachment, combine your softened butter, white sugar, and brown sugar. Beat on medium-high for at least 3-4 minutes. You are looking for a visual change: the mixture should turn pale, fluffy, and significantly increased in volume. This aeration is what creates the “chunky and golden” center later on.
Once the butter and sugars are creamed, add the egg and vanilla extract. Beat for another minute until the mixture looks like a smooth, thick ribbon. Scrape down the sides of the bowl to ensure no streaks of butter remain, as these can cause the cookies to “puddle” in the oven.
The Dry Ingredient Folding Technique
In a separate bowl, whisk together the flour, baking soda, and salt. Turn your mixer to the lowest setting and slowly add the flour mixture. Mix only until a few streaks of white remain. Over-mixing at this stage will develop gluten, turning your “rustic” cookie into something tough and bread-like.
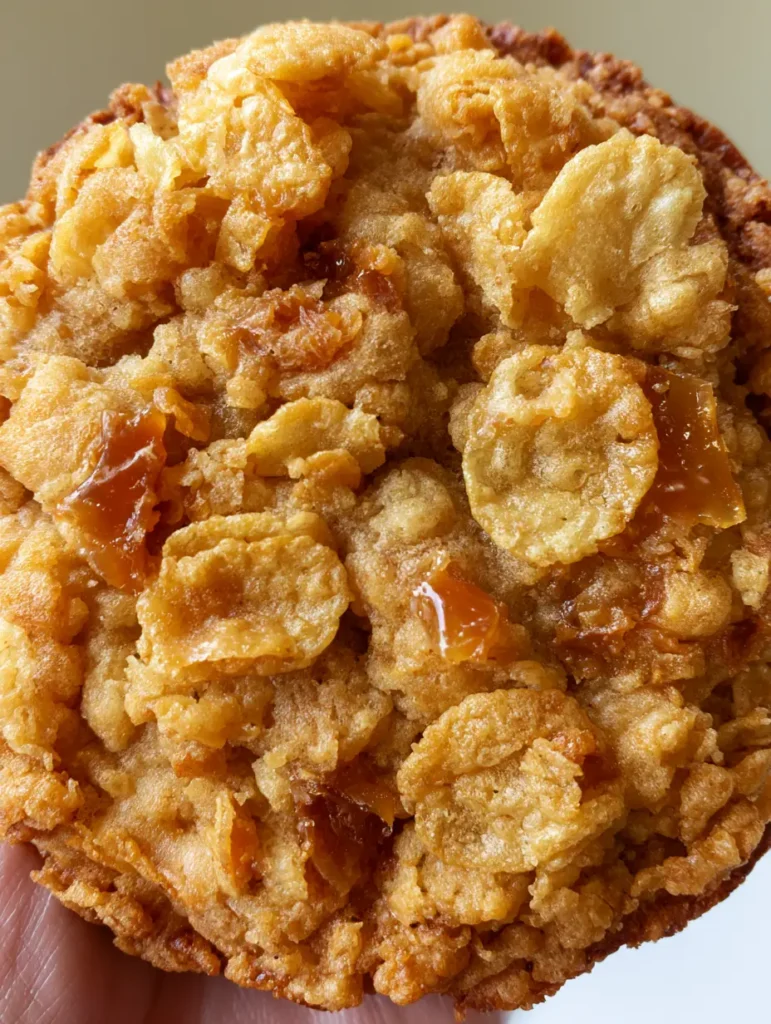
Now, it is time for the manual labor. Using a large spatula, fold in the toffee bits and 2 cups of the cornflakes. Be gentle! You want to crush some of the cornflakes to distribute that cereal flavor, but keep many of them whole to achieve that “rugged, craggy surface” described in our visual blueprint.
The “Double-Crunch” Topping Method
For a cookie that looks exactly like our Midjourney prompt, you cannot just mix the cereal in. After scooping the dough into 3-tablespoon balls, take the remaining 1 cup of cornflakes and gently press them into the exterior of the dough balls. This ensures that “whole and crushed golden cornflake cereal pieces” are embedded and visible on the surface after baking.
Chill the dough balls in the refrigerator for at least 30 minutes. This cold start is a culinary secret; it prevents the butter from melting too fast, ensuring the cookie stays thick and the toffee forms “glistening shards” rather than a greasy pool.
Baking for Caramelized Sugar Edges
Preheat your oven to 350°F (175°C). Place the chilled dough balls 3 inches apart on your prepared baking sheets. Bake for 10-12 minutes. Watch for the sensory cues: the kitchen should smell like toasted grain and burnt sugar. You want to pull them out when the edges are “slightly darker and caramelized” but the centers still look slightly soft and “matte.”
Let the cookies rest on the hot baking sheet for 5 minutes. This “carry-over cooking” is essential for setting the structure. If you move them too early, the melted amber toffee will cause them to fall apart. Once set, move them to a wire rack to cool completely.
Expert Tips for Visual and Flavor Success
- The “Soothe” Method: If your cookies come out in irregular shapes, immediately place a large circular glass or cookie cutter over the hot cookie and gently “scoot” it in a circular motion. This rounds out the edges while keeping the surface craggy.
- Salt Finishing: For an extra “glistening” look, sprinkle a tiny pinch of flaky sea salt over the cookies the moment they come out of the oven. It emphasizes the amber toffee shards.
- Cereal Choice: Use a thick-cut cornflake if possible. Thinner, generic brands tend to dissolve more quickly into the dough, losing that “toasted cereal” visual.
- Avoid Over-Baking: Because the cornflakes are already toasted, they can go from golden to burnt quickly. Set your timer for the minimum suggested time and check for those caramelized edges.
Maximizing Freshness and Texture
These Cornflake Toffee Cookies are best enjoyed within 48 hours when the cornflakes are at their maximum crunch. Store them in an airtight container at room temperature. Pro tip: place a piece of parchment paper between layers to prevent the “sticky-sweet” toffee from sticking the cookies together.
If you need to store them longer, these cookies freeze beautifully. Freeze the baked cookies in a single layer on a tray before transferring them to a zip-top bag. They will stay fresh for up to 3 months. When you’re ready for a treat, just let them thaw at room temperature for an hour, or pop them in a 300°F (150°C) oven for 2 minutes to revive the crunch.
What to Serve with These Crunchy Cookies
While these cookies are a powerhouse on their own, they pair beautifully with a variety of meals. For a balanced day, consider serving them after a savory dinner like our spiced chicken shawarma or a comforting crispy tater tot casserole.
If you’re looking for more quick family dinner ideas to clear the way for a baking session, try a one-pot meal like savory chicken sausage orzo. The simplicity of the dinner makes the “thick, rustic” dessert feel even more like a special reward.
Frequently Asked Questions
Yes, you can swap the all-purpose flour for a 1:1 gluten-free baking blend. Just ensure your cornflakes are certified gluten-free, as some brands use malt flavoring derived from barley.
You can, but the cookies will be significantly sweeter. If using Frosted Flakes, I recommend reducing the granulated white sugar by 2 tablespoons to maintain a balanced flavor profile.
The secret is adding a few extra toffee bits to the top of the dough balls right before baking. As they melt, they stay on the surface, creating those visible amber shards.
This usually happens if the dough is too wet or if the cookies are stored before they have completely cooled. Ensure you measure your flour accurately and cool the cookies on a wire rack.
Chilling the dough ensures the butter stays solid longer in the oven, preventing the cookies from spreading too thin. This maintains the ‘thick and rustic’ profile and keeps the toffee bits from pooling.
The Ultimate Cornflake Toffee Cookie Recipe
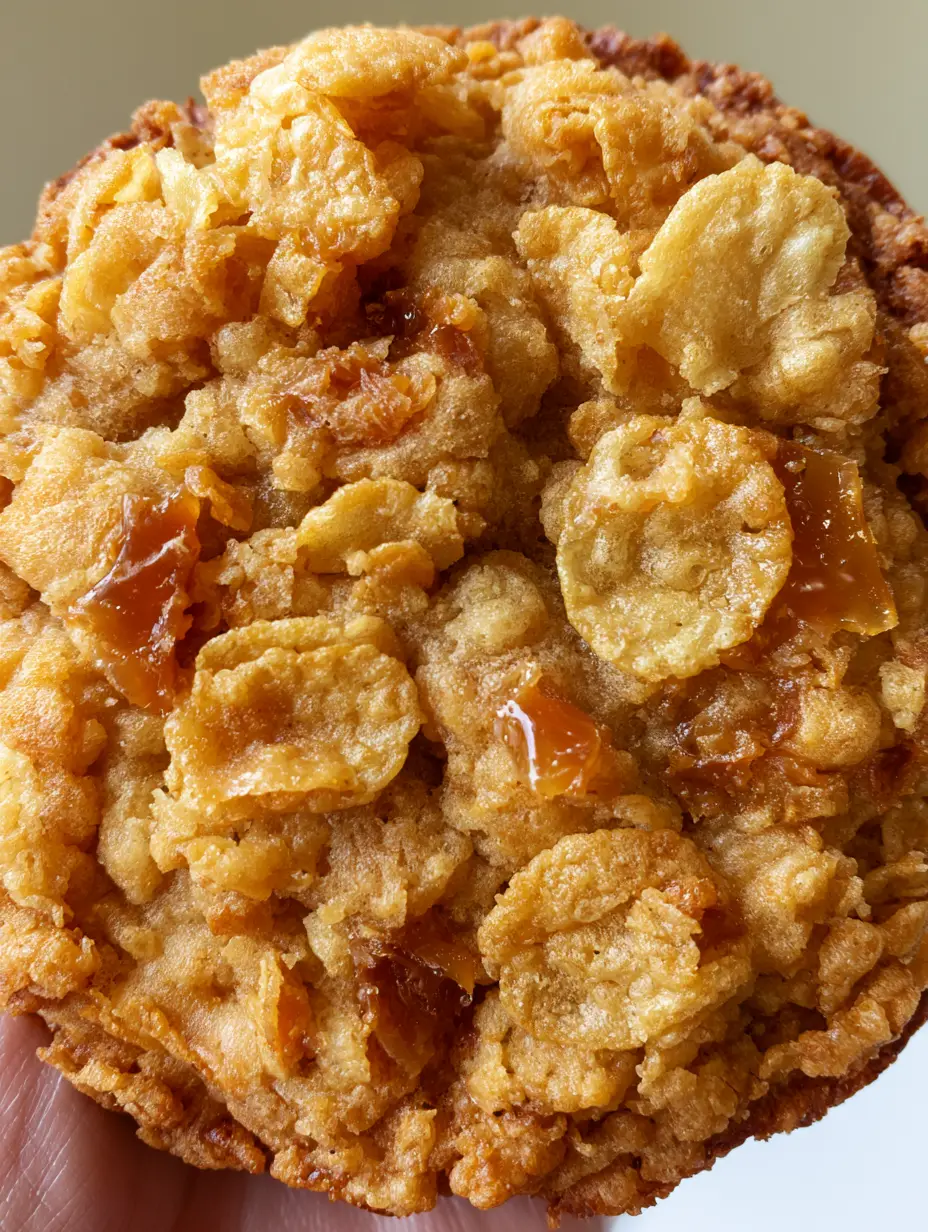
Cornflake Toffee Cookies with Caramelized Edges and Toasted Cereal
Ingredients
Equipment
Method
- In a stand mixer, cream the softened butter, white sugar, and brown sugar on medium-high for 3-4 minutes until pale and fluffy.
- Beat in the egg and vanilla extract for 1 minute until well combined and smooth.
- Whisk flour, baking soda, and salt together. Add to the wet ingredients on low speed, mixing until just combined.
- Gently fold in the toffee bits and 2 cups of the cornflakes by hand, crushing some cereal while leaving others whole for a rugged texture.
- Scoop 3-tablespoon sized balls and press the remaining 1 cup of cornflakes into the surface. Chill for 30 minutes.
- Preheat oven to 350°F (175°C). Bake for 10-12 minutes until edges are dark golden-brown and caramelized but centers are still matte.
- Cool on the baking sheet for 5 minutes to let the toffee set before moving to a wire rack.
Notes
Chill the dough to ensure the cookies stay thick and don't spread too thin.
Share Your Rustic Cookie Creations!
Nothing beats the satisfaction of pulling a tray of these golden-brown, toffee-laden masterpieces out of the oven. The combination of the rugged cereal texture and the deep caramelization makes these Cornflake Toffee Cookies a guaranteed favorite for any occasion. We would love to see your “handheld smartphone photos” of your bakes!
If you enjoyed this recipe, please leave a comment below and let us know how your cookies turned out. Don’t forget to follow us on Pinterest for more rustic cooking inspiration and share this recipe with your fellow cookie lovers. Happy baking!