There is a specific kind of magic that happens when high-heat searing meets the velvety embrace of tropical aromatics. This Creamy Coconut Milk Chicken is the ultimate embodiment of that culinary synergy, offering a dish that is as visually stunning as it is deeply comforting.
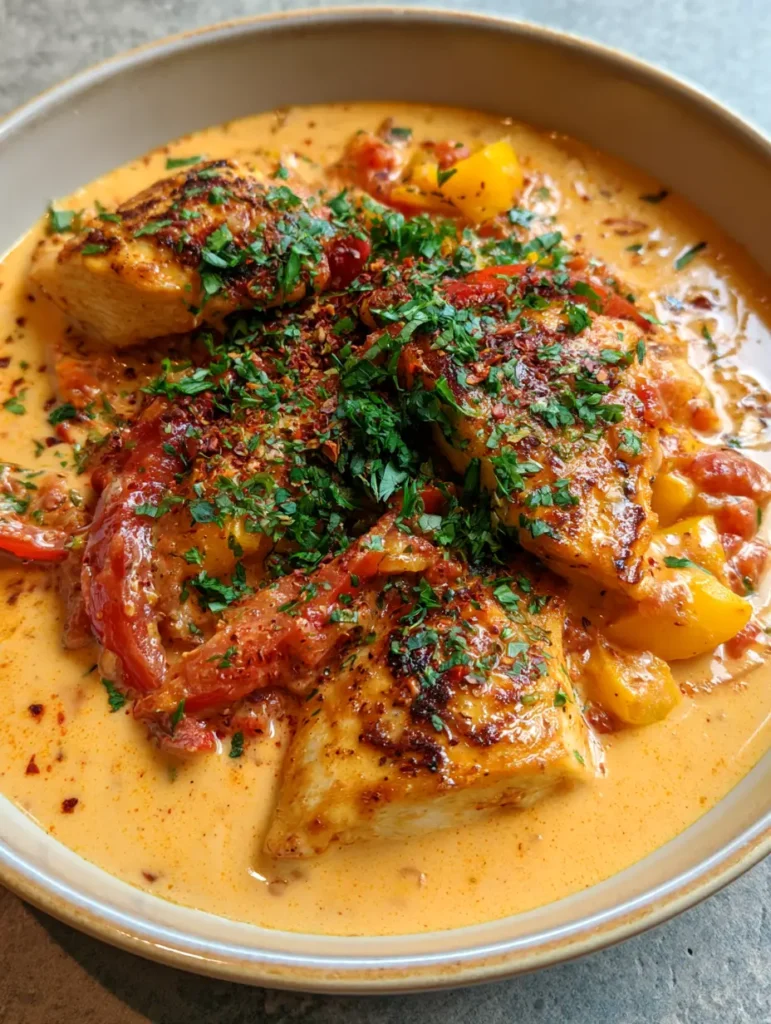
Imagine tender, golden-brown chicken pieces nestled in a thick, pale-orange sauce that hums with the subtle sweetness of coconut and the savory depth of stewed tomatoes. It’s a meal designed for those who crave the richness of a 5-star restaurant dish but need the simplicity of a one-pan weeknight wonder.
Captured in the soft glow of natural daylight, the glistening texture of the chicken and the vibrant pop of red and yellow bell peppers make this recipe a true showstopper. Whether you are a seasoned pro or a home cook looking to expand your repertoire, this guide will walk you through every sensory cue to ensure a flawless result.

Why This One-Pan Creamy Coconut Milk Chicken Will Become Your New Obsession
- Textural Contrast: You get the crunch of a hard sear on the chicken skin (or surface) paired with the silkiness of a sauce that has been reduced to perfection.
- Vibrant Visual Appeal: The combination of softened red bell pepper strips and yellow bell pepper chunks creates a “confetti” effect against the pale-orange backdrop.
- Balanced Heat: A light dusting of red chili flakes provides a gentle back-of-the-throat warmth that cuts through the richness of the coconut fats.
- Foundational Simplicity: Despite its complex flavor profile, this dish relies on pantry staples and fresh produce found in any local market.
The Flavor Blueprint: Ingredients for the Ultimate Creamy Chicken
To achieve the specific visual and flavor profile of our Creamy Coconut Milk Chicken, each ingredient serves a tactical purpose in the pan.
Chicken Thighs or Breasts (1.5 lbs / 680g): I recommend boneless, skinless thighs for maximum juiciness, though breasts work well if you monitor the internal temperature closely. The goal is a deep golden-brown exterior with visible sear marks.
Full-Fat Coconut Milk (14 oz / 400ml): This is the backbone of the sauce. Avoid “light” versions, as we need the natural saturated fats to create that “thick, pale-orange” consistency seen in the visual blueprint.
Red and Yellow Bell Peppers (1 each): We use a mix of red strips for softness and yellow chunks for structural variety. These add a natural sweetness that balances the savory chicken.
Stewed Tomato Pieces (1/2 cup / 120g): These are critical for the sauce’s color. As they break down, their lycopene bleeds into the white coconut milk, creating that signature pale-orange hue.
Yellow Onion (1 medium): Sautéed until translucent and slightly caramelized, the onion provides a foundational sweetness and aromatic base for the entire dish.
Neutral High-Smoke Point Oil (2 tbsp / 30ml): Use avocado or grapeseed oil. This allows you to sear the chicken at high heat without the oil smoking or turning bitter.
Fresh Cilantro (1/4 cup / 15g): Finely chopped and added at the very end. The residual heat awakens the oils in the cilantro, providing a fresh, herbal counterpoint to the stewed vegetables.
Red Chili Flakes (1 tsp / 2g): A light dusting adds visual “freckles” to the sauce and a necessary hit of spice.
Kosher Salt and Cracked Black Pepper: Essential for layering flavor at every stage, especially during the initial sear.
Essential Tools for a Professional Sear
To replicate the shallow ceramic bowl presentation and the “glistening” texture of the chicken, you need the right gear. A heavy-bottomed cast iron skillet or a high-quality stainless steel pan is non-negotiable for achieving those dark sear marks.
A wide, shallow pan allows for better evaporation, which is how we turn thin coconut milk into a “thick, pale-orange sauce.” If the pan is too deep or crowded, the chicken will steam rather than sear, and you’ll lose that beautiful golden crust.
Step-by-Step: Mastering the Art of Coconut Milk Chicken
Phase 1: The Golden Maillard Sear
Pat your chicken pieces completely dry with paper towels. Season aggressively with salt and pepper. Heat your oil in the skillet over medium-high heat until it shimmers but isn’t smoking.
Place the chicken in the pan and LEAVE IT ALONE. To get those visible sear marks, the chicken needs uninterrupted contact with the heat for 5-6 minutes. Flip only when the meat releases easily from the pan, revealing a glistening, golden-brown crust.
Phase 2: Building the Aromatic Base
Remove the chicken and set it aside. In the same pan, toss in your diced onions and bell peppers. The moisture from the vegetables will help deglaze the “fond” (the brown bits) from the bottom of the pan.
Sauté until the red strips are softened and the onions are golden. This is where the “stewed” texture of the vegetables begins to develop, ensuring they melt into the final sauce.
Phase 3: Creating the Pale-Orange Sauce
Add your stewed tomato pieces and pour in the full-fat coconut milk. Use your wooden spoon to stir the tomatoes into the milk. Watch as the white liquid transforms into a vibrant, pale-orange sauce.
Bring the mixture to a gentle simmer. Lower the heat to medium-low to prevent the coconut milk from “breaking” or curdling. We want a smooth, homogenous emulsion that looks like liquid silk.
Phase 4: The Final Braise and Garnish
Nestle the seared chicken back into the sauce, making sure not to fully submerge the tops so the crust stays somewhat crisp. Simmer for 8-10 minutes until the sauce has thickened and the chicken is cooked through.
Just before serving, sprinkle the finely chopped cilantro and red chili flakes across the top. The green and red against the orange sauce create the exact visual harmony described in our recipe blueprint.
Pro Tips for a Flawless Finish
- Don’t Shake the Can: If your coconut milk has separated in the can, that’s great! Use the thick cream at the top first to sauté your aromatics for an even deeper coconut flavor.
- Acid is Your Friend: If the sauce feels too heavy, a squeeze of fresh lime juice right at the end will brighten the entire dish without changing the “creamy” appearance.
- Control the Orange: For a deeper orange color, crush the stewed tomatoes more thoroughly into the sauce. For a lighter, pastels-orange, keep the tomato pieces larger.
- The Resting Period: Let the dish sit for 3-5 minutes after turning off the heat. This allows the sauce to “set” and reach its maximum thickness.
What to Serve with Your Creamy Coconut Milk Chicken
This dish is incredibly versatile. Because the sauce is so rich and plentiful, you’ll want a side that can act as a sponge. While a simple jasmine rice is traditional, you might enjoy pairing it with something more adventurous.
If you love this flavor profile, you might also enjoy our creamy Cajun chicken and rice for a bit more spice. For those who prefer a pasta base, this sauce mimics the luxury of a creamy Tuscan chicken pasta but with a tropical twist.
Looking for more one-pan wonders? Check out our pan-seared chicken marsala or explore the deep, aromatic flavors of Peruvian chicken and rice to keep your weeknight dinners exciting.
Frequently Asked Questions
If you aren’t a fan of cilantro, fresh Thai basil or flat-leaf parsley make excellent substitutes that still provide a fresh green contrast.
You can, but the sauce will be significantly thinner and will not achieve the ‘thick’ glistening texture shown in the photos. Full-fat is highly recommended for the best mouthfeel.
The secret is high heat and patience. Pat the chicken dry with paper towels, use a high-smoke point oil, and do not move the chicken for at least 5 minutes once it hits the pan.
The red chili flakes add a mild heat, but the coconut milk is very cooling. You can adjust the spice level by increasing or decreasing the chili flakes to your preference.
The orange hue comes from the stewed tomatoes breaking down into the white coconut milk. Stirring them well ensures the pigments emulsify into the sauce.
The Complete Creamy Coconut Milk Chicken Recipe
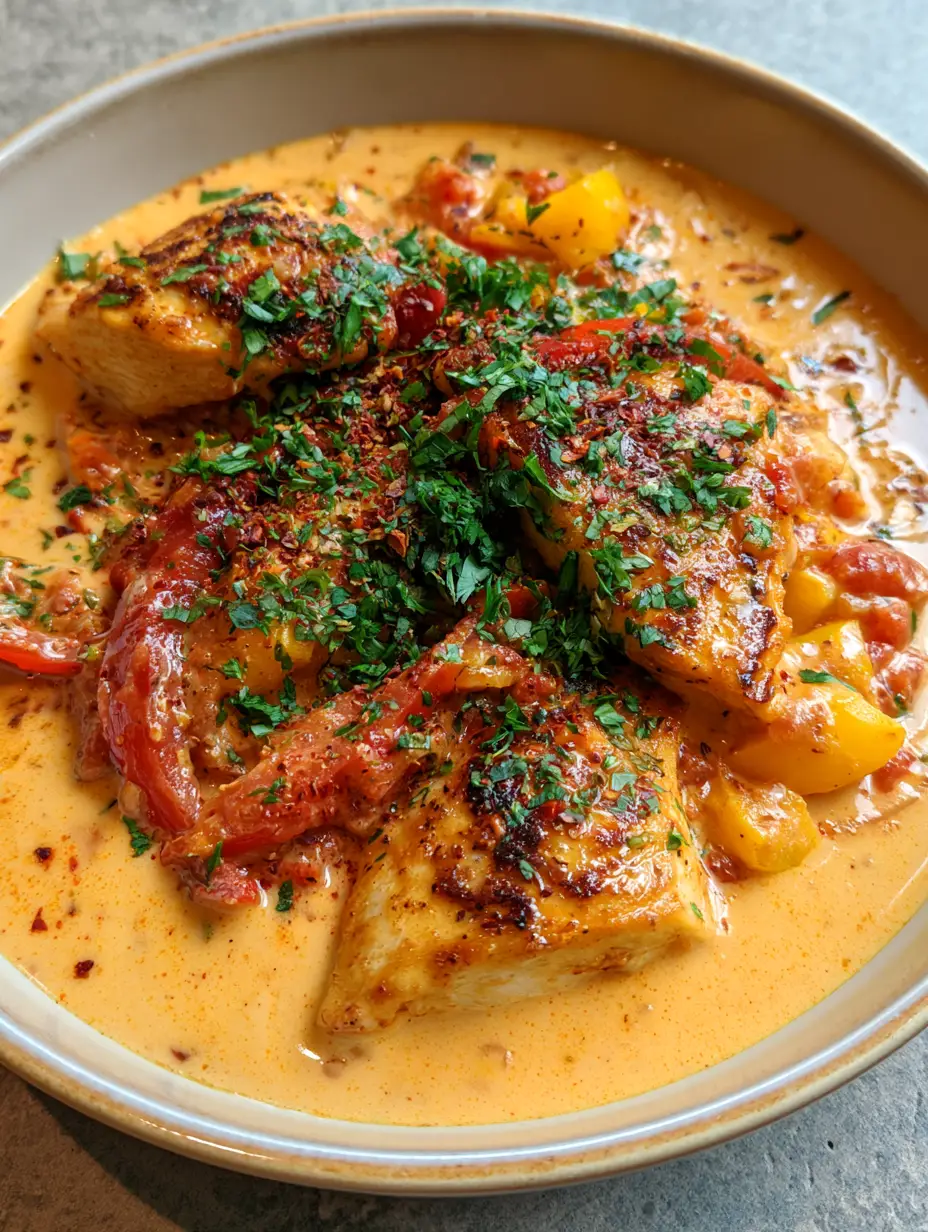
Creamy Coconut Milk Chicken with Seared Peppers and Stewed Tomatoes
Ingredients
Equipment
Method
- Pat chicken dry and season. Heat oil in skillet. Sear chicken for 5-6 minutes per side until golden-brown with visible sear marks. Remove and set aside.
- In the same pan, sauté onions and bell peppers until softened. The red strips should be pliable and the onions translucent.
- Add stewed tomatoes and coconut milk. Stir until the sauce turns a thick, pale-orange color. Simmer gently.
- Return chicken to the pan. Simmer for 8 minutes. Garnish with chopped cilantro and red chili flakes before serving in shallow bowls.
Notes
Use full-fat coconut milk for the required creamy texture.

Bringing the Restaurant Experience Home
This Creamy Coconut Milk Chicken proves that you don’t need a professional kitchen to produce a meal that looks like it belongs in a magazine. By focusing on the “Visual Recipe Blueprint”—the golden sear, the pale-orange sauce, and the vibrant peppers—you’ve created a dish that hits every sensory high note.
We would love to see your results! If you made this dish, please leave a comment below and tell us how your sear turned out. Don’t forget to follow us on Pinterest for more visually-driven recipe inspiration and share this post with your fellow home cooks.