When it comes to high-end patisserie textures, nothing rivals the sophisticated combination of Italian mascarpone and roasted pistachios. This Pistachio Mascarpone Cake Filling is specifically engineered to provide a thick, stable, and velvety layer that transforms a simple cake into a gourmet masterpiece. Whether you are building a towering celebration cake or a delicate afternoon tea treat, this filling offers the structural integrity required for multi-layered designs without sacrificing that melt-in-the-mouth quality.
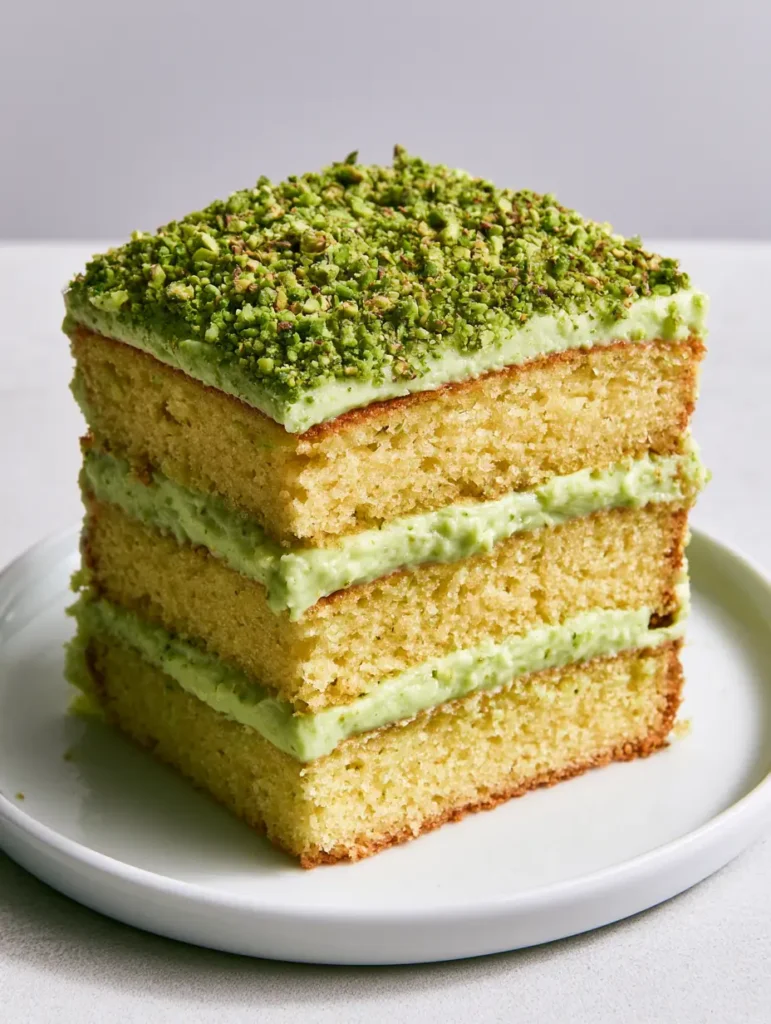
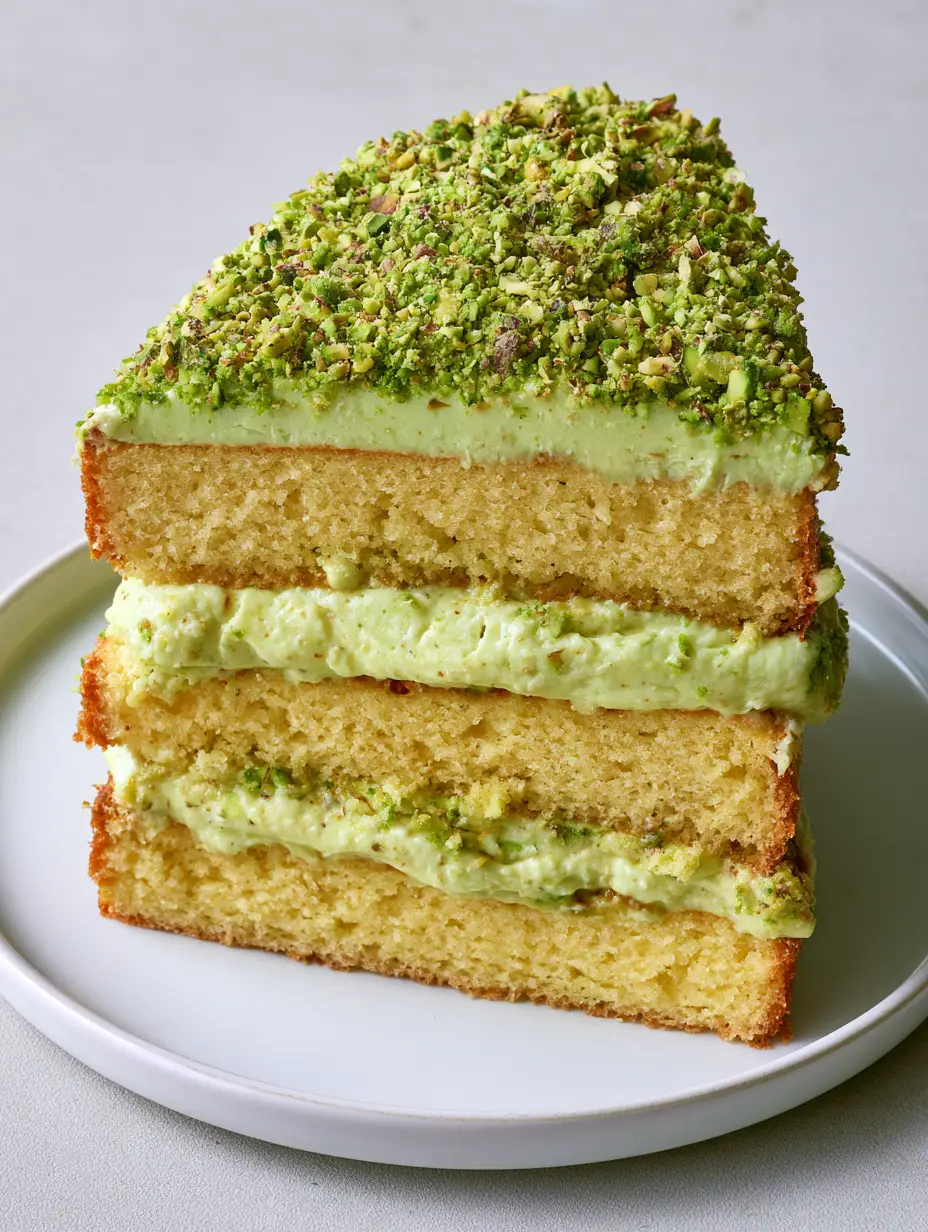
The visual appeal of this dessert is undeniable, featuring three moist, golden-yellow sponge layers that contrast beautifully against the pale green pistachio mascarpone filling. Every bite delivers a symphony of textures, from the light aeration of the sponge to the dense, buttery richness of the pistachio-infused cream. Topped with a smooth pistachio frosting and a heavy garnish of vibrant green roasted pistachios, this recipe is as much a feast for the eyes as it is for the palate.
In this comprehensive guide, we will dive deep into the culinary science of stabilizing mascarpone, the art of selecting the finest pistachios, and the step-by-step techniques to achieve that professional, handheld-photo-worthy finish. If you’ve ever struggled with fillings that bulge or seep, this recipe is your definitive solution for a flawless, high-RPM dessert profile.
Why This Pistachio Mascarpone Cake Filling Is a Game-Changer
- Structural Superiority: Unlike standard buttercream, this mascarpone-based filling is thick and stable, ensuring your layers stay perfectly aligned without the need for excessive stabilizers.
- Visual Contrast: The delicate, pale green hue of the filling provides a stunning aesthetic bridge between the golden sponge and the deep, vibrant green of the crushed roasted pistachios.
- Flavor Complexity: We utilize professional-grade pistachio paste and roasted nuts to achieve a multi-dimensional flavor that balances salt, fat, and subtle sweetness.
- Versatile Application: While perfect for cakes, this filling also pairs beautifully with a decadent chocolate pistachio tart or as a decadent center for an entremet.
The Anatomy of Flavor: Essential Ingredients for Success
Achieving the perfect Pistachio Mascarpone Cake Filling requires a balance of high-fat dairy and concentrated nut essences. Each ingredient plays a specific role in the texture and longevity of the final product.
Mascarpone Cheese (Full Fat): Use 16 oz (450g) of chilled Italian mascarpone. This provides the primary structure and a rich, velvety mouthfeel that is less tangy than American cream cheese.
Heavy Whipping Cream (36% Fat): You will need 1.5 cups (360ml) of very cold heavy cream. The fat globules in the cream provide the aeration needed to keep the filling from becoming too dense.
Pure Pistachio Paste: 0.5 cup (125g) of unsweetened pistachio paste is the secret to that authentic pale green color. It provides a concentrated nutty flavor that whole nuts alone cannot replicate.
Powdered Sugar: 1.25 cups (150g) of sifted icing sugar sweetens the filling while the cornstarch typically found in powdered sugar helps stabilize the dairy.
Vanilla Bean Paste: 1 tsp (5ml) adds those beautiful black specks and a floral aromatic profile that complements the earthiness of the pistachios.
Golden Sponge Layers: To achieve the visual prompt, you’ll need three 8-inch (20cm) golden sponge cakes. These provide the moist, sturdy base necessary to support the heavy layers of filling.
Roasted Pistachios: 1 cup (150g) of vibrant green, roasted, unsalted pistachios. These will be finely crushed to create the iconic heavy garnish described in our visual blueprint.
Essential Tools for a Professional Three-Layer Masterpiece
To replicate the smooth, even layers seen in professional handheld smartphone photography, you will need the right equipment. Using the correct tools ensures the filling is applied evenly and the cake remains level.
A stand mixer with a paddle attachment is ideal for softening the mascarpone without over-incorporating air too early. You will also need a sharp chef’s knife or a food processor to achieve the “finely crushed” texture of the pistachio garnish. An offset spatula is non-negotiable for spreading the smooth pistachio frosting and filling layers to a uniform thickness.
For the sponge layers, high-quality 8-inch cake pans lined with parchment paper are essential for achieving that clean, golden-yellow finish. Finally, a rotating cake stand will make the garnishing process much easier, allowing you to apply the dense layer of pistachios evenly across the top surface.
Step-by-Step Mastery: Constructing the Pistachio Mascarpone Cake
Achieving the Perfect Golden Sponge Base
Preheat your oven to 350°F (175°C). In a large bowl, cream together 1 cup (225g) of softened butter and 1.5 cups (300g) of granulated sugar until the mixture is light and dandelion yellow. This aeration is the key to a moist sponge.
Add 4 large eggs one at a time, ensuring each is fully incorporated before adding the next. Sift in 2.5 cups (310g) of all-purpose flour, 2 tsp (10g) of baking powder, and a pinch of salt. Fold in 1 cup (240ml) of whole milk until the batter is smooth and ribbons off the spatula.
Divide the batter between three greased pans and bake for 25-30 minutes. You are looking for a visual cue: the edges should just begin to pull away from the pan and the tops should spring back when lightly pressed. Cool completely before slicing to ensure the Pistachio Mascarpone Cake Filling doesn’t melt upon contact.
Whipping the Velvet: The Mascarpone Filling Secret
In your stand mixer, combine the cold mascarpone and pistachio paste. Mix on medium-low speed until just combined and smooth. Do not over-mix, as mascarpone can break and become grainy if overworked.
Slowly pour in the heavy whipping cream while the mixer is running on low. Once the cream is incorporated, increase the speed to medium-high. Watch for the sensory cue: the mixture will begin to thicken and form soft peaks, taking on a beautiful pale green hue.
Sift in the powdered sugar and add the vanilla bean paste. Continue to whip until stiff, stable peaks form. The texture should be thick and velvety, capable of holding its shape between the heavy sponge layers. If you enjoy this flavor profile, you might also love our pistachio praline entremet (coming soon) for your next baking project.
Assembly and the “Heavily Garnished” Finish
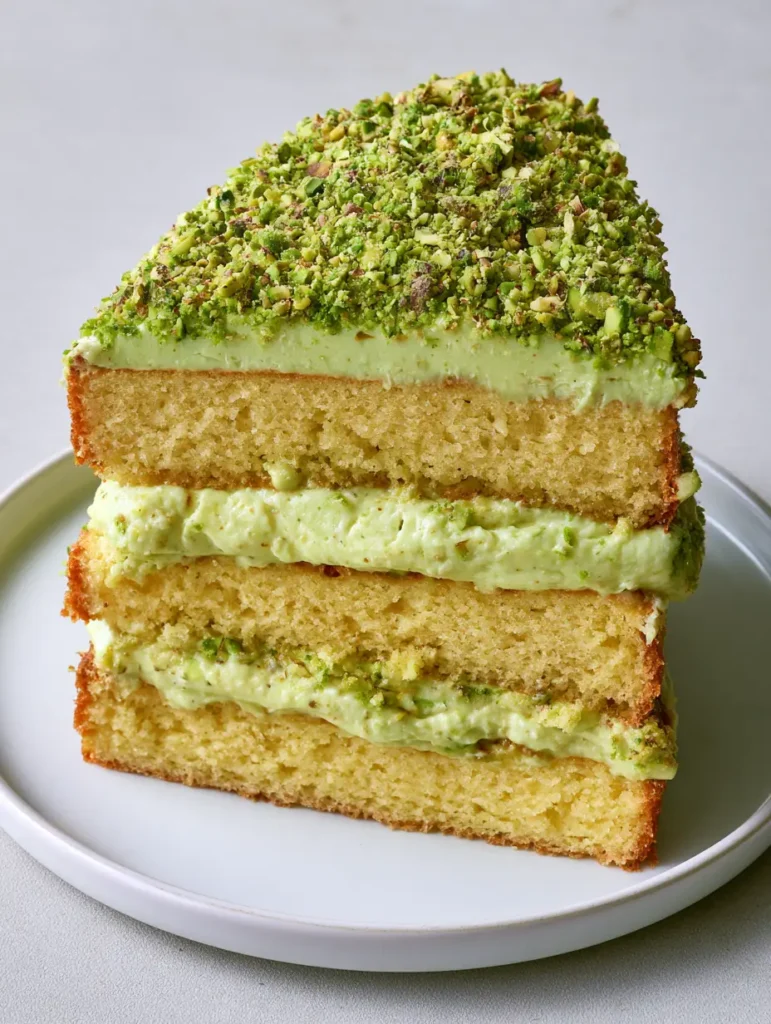
Place your first golden sponge layer on a serving plate. Apply a generous, even layer of the pale green filling, roughly 0.75 inches (2cm) thick. Repeat this process with the second and third layers, ensuring the cake remains perfectly vertical.
Coat the top and sides (if desired, or leave as a naked cake for visual contrast) with the remaining smooth pistachio frosting. Use an offset spatula to create a flat, even surface on the top of the slice.
Now for the signature move: take your finely crushed roasted pistachios and apply them in a dense layer across the entire top surface. Press down very lightly to ensure they adhere to the frosting. The result should be a vibrant green, textured crust that contrasts with the smooth filling below.
Expert Tips for a Flawless Pistachio Finish
- Temperature Control: Always ensure your mascarpone and heavy cream are ice-cold. If the dairy is too warm, the emulsion won’t stabilize, and your filling will be runny.
- Sift Your Sugar: Mascarpone is very smooth; any lumps in your powdered sugar will be immediately apparent in the velvety texture.
- The Nut Quality: Look for “Turkish” or “Bronte” pistachios if possible. These varieties are famous for their intense green color, which is essential for the visual appeal of this recipe.
- Stabilization Hack: If you are transporting the cake in a warm environment, you can add 1 tsp of skim milk powder to the cream before whipping to provide extra protein for stabilization.
- Pairing Textures: For an even more complex dessert experience, consider serving a slice alongside honey pistachio cheesecake bars for a pistachio-themed dessert platter.
Preserving the Velvety Texture: Storage and Freezing Secrets
Because of the high dairy content, this cake must be stored in the refrigerator. Place it in a cake carrier or cover loosely with plastic wrap to prevent the sponge from drying out. It will remain fresh and stable for up to 3 days.
For longer storage, you can freeze individual slices. Wrap each slice tightly in plastic wrap and then aluminum foil. When you are ready to enjoy, thaw the slice in the refrigerator overnight. This preserves the “moist, golden-yellow” quality of the sponge without making the mascarpone grainy.
Avoid freezing the cake with the crushed pistachio garnish if possible, as the nuts can lose their characteristic crunch in the freezer. For the best experience, add the fresh roasted pistachios just before serving.
What to Serve With Your Pistachio Masterpiece
This rich, nutty cake pairs wonderfully with light, acidic accompaniments. A fresh raspberry coulis or a side of macerated strawberries cuts through the fat of the mascarpone beautifully. If you’re looking for more pistachio inspiration, try our salted caramel pretzel cheesecake bites for a salty-sweet contrast.
For a complete dessert spread, you might also consider adding some air fryer cinnamon sugar twists to provide a different textural element. The warm cinnamon notes pair surprisingly well with the earthiness of the pistachio.
Frequently Asked Questions
Yes, you can make it up to 24 hours in advance. Store it in an airtight container in the fridge, but you may need to give it a very brief whisk before using to restore the velvety texture.
While possible, cream cheese is tangier and softer. Mascarpone provides a higher fat content (approx 75%), which is essential for the ‘thick, stable’ texture seen in the visual prompt.
No, the high fat content of the mascarpone combined with whipped heavy cream and powdered sugar provides enough structural integrity for a 3-layer cake without gelatin.
The key is using high-quality pistachio paste and Turkish or Bronte pistachios for the garnish. These varieties naturally possess a deep green hue.
Mascarpone can easily break if over-mixed or if it gets too warm. Always use ice-cold ingredients and stop mixing as soon as stiff peaks form.
The Ultimate Pistachio Mascarpone Cake Filling Recipe
Pistachio Mascarpone Cake Filling: The Ultimate Silky and Stable Recipe
Ingredients
Equipment
Method
- Cream softened butter and sugar until light and dandelion yellow. Add eggs one at a time.
- Fold in dry ingredients and milk. Divide into three 8-inch pans and bake at 350°F (175°C) for 25-30 minutes until golden.
- Mix cold mascarpone and pistachio paste until smooth. Slowly add heavy cream.
- Add powdered sugar and vanilla. Whip until thick, stable peaks form and the color is a pale green.
- Spread thick layers of filling between the three golden sponge layers. Smooth the top with frosting.
- Heavily garnish the top surface with a dense layer of finely crushed roasted pistachios.
Notes
Keep dairy ingredients ice-cold to ensure the filling stabilizes correctly.
Bringing the Bakery Home: Final Thoughts
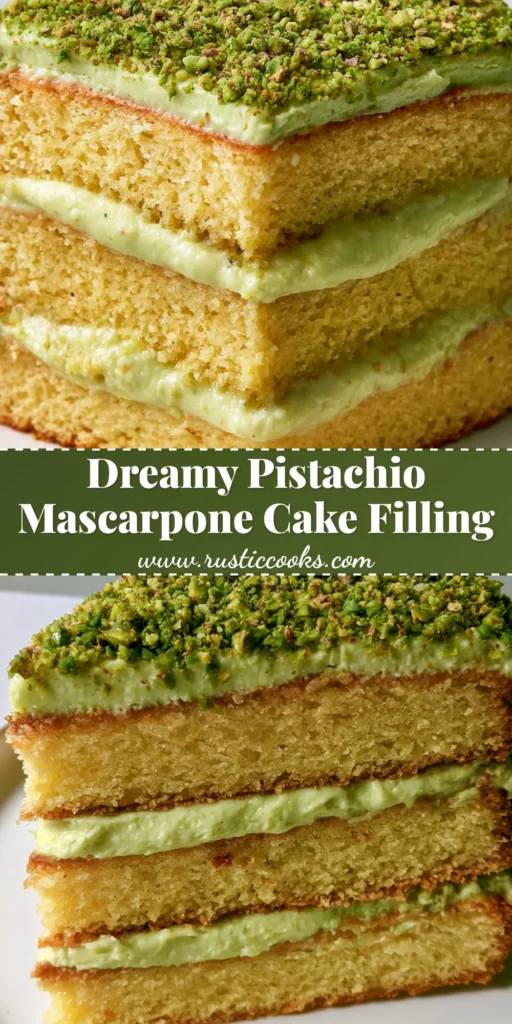
Mastering the Pistachio Mascarpone Cake Filling is a rite of passage for any serious home baker. Its combination of stability, vibrant color, and deep nutty flavor makes it a versatile tool in your culinary arsenal. We hope this guide helps you achieve that perfect, three-layered golden sponge look that looks like it was pulled straight from a professional’s handheld smartphone gallery.
Did you try this recipe? We’d love to see your results! Leave a comment below or share your photos on social media. For more rustic and reliable recipes, be sure to follow us on Pinterest and join our community of enthusiastic home cooks.