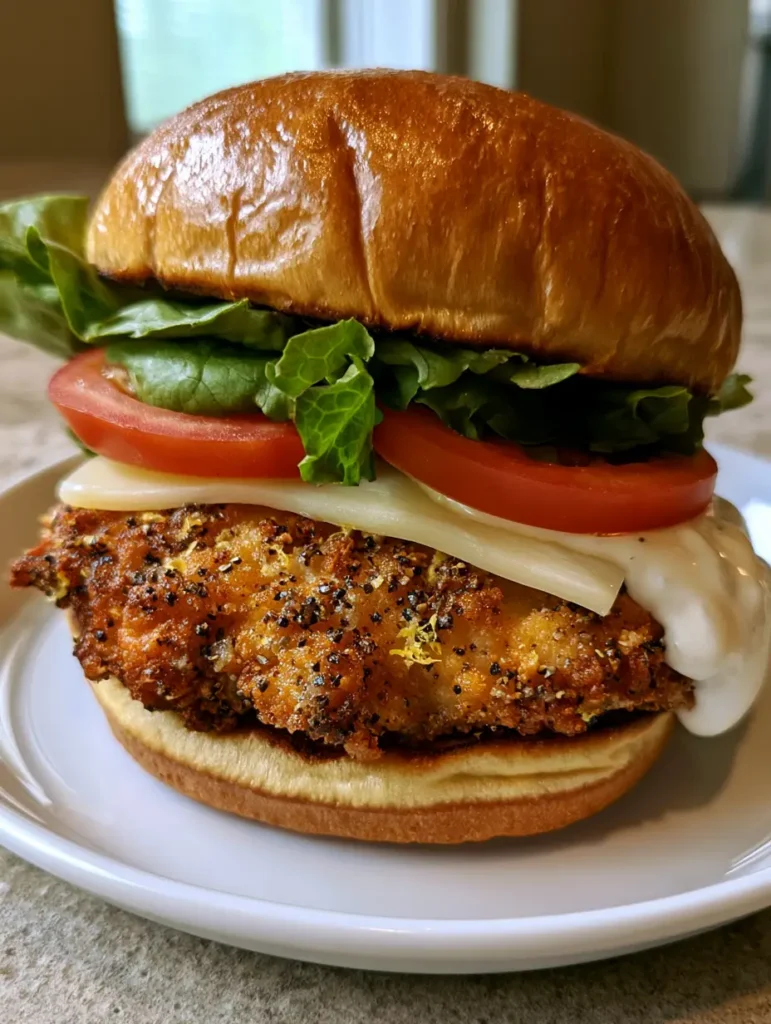
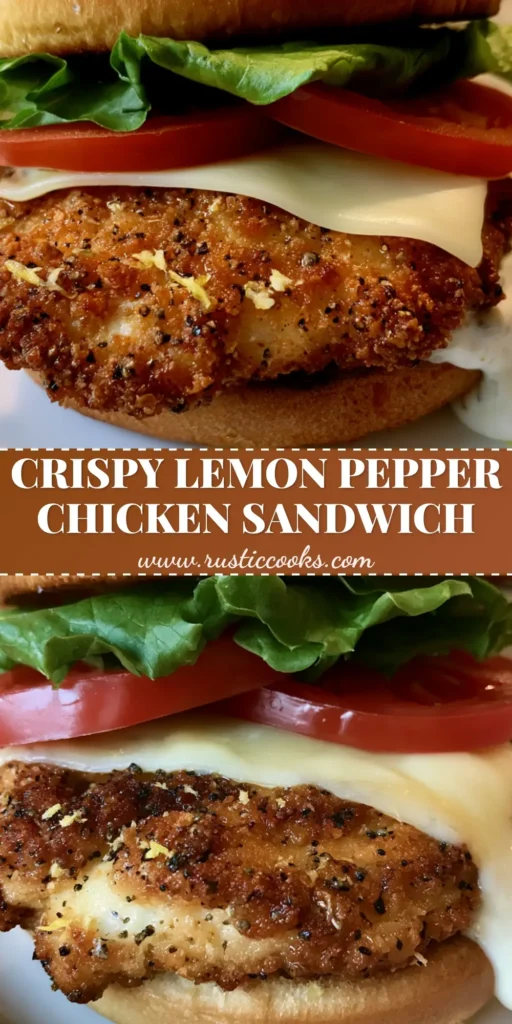
The Crispy Lemon Pepper Chicken Sandwich is more than just a meal; it is a masterclass in texture and balanced acidity. Imagine biting through a buttery, toasted brioche bun into a golden-brown chicken breast that shatters with every mouthful. This isn’t your average drive-thru offering; it’s a high-end culinary experience designed for those who crave the zing of citrus paired with the bold punch of cracked black pepper.
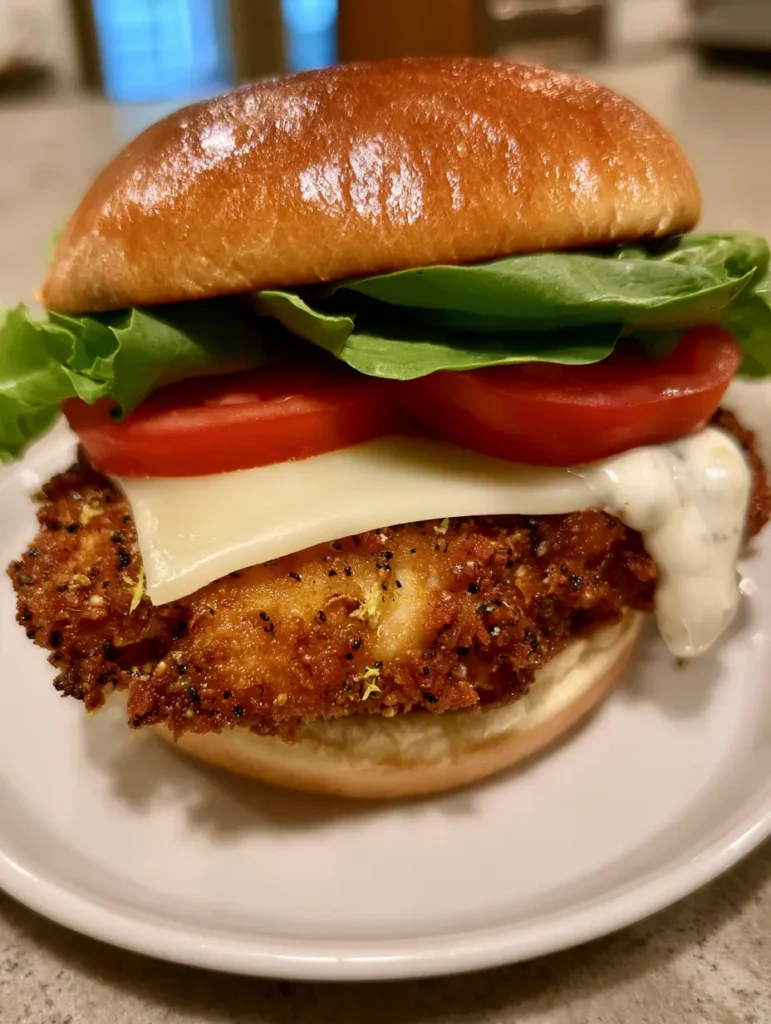
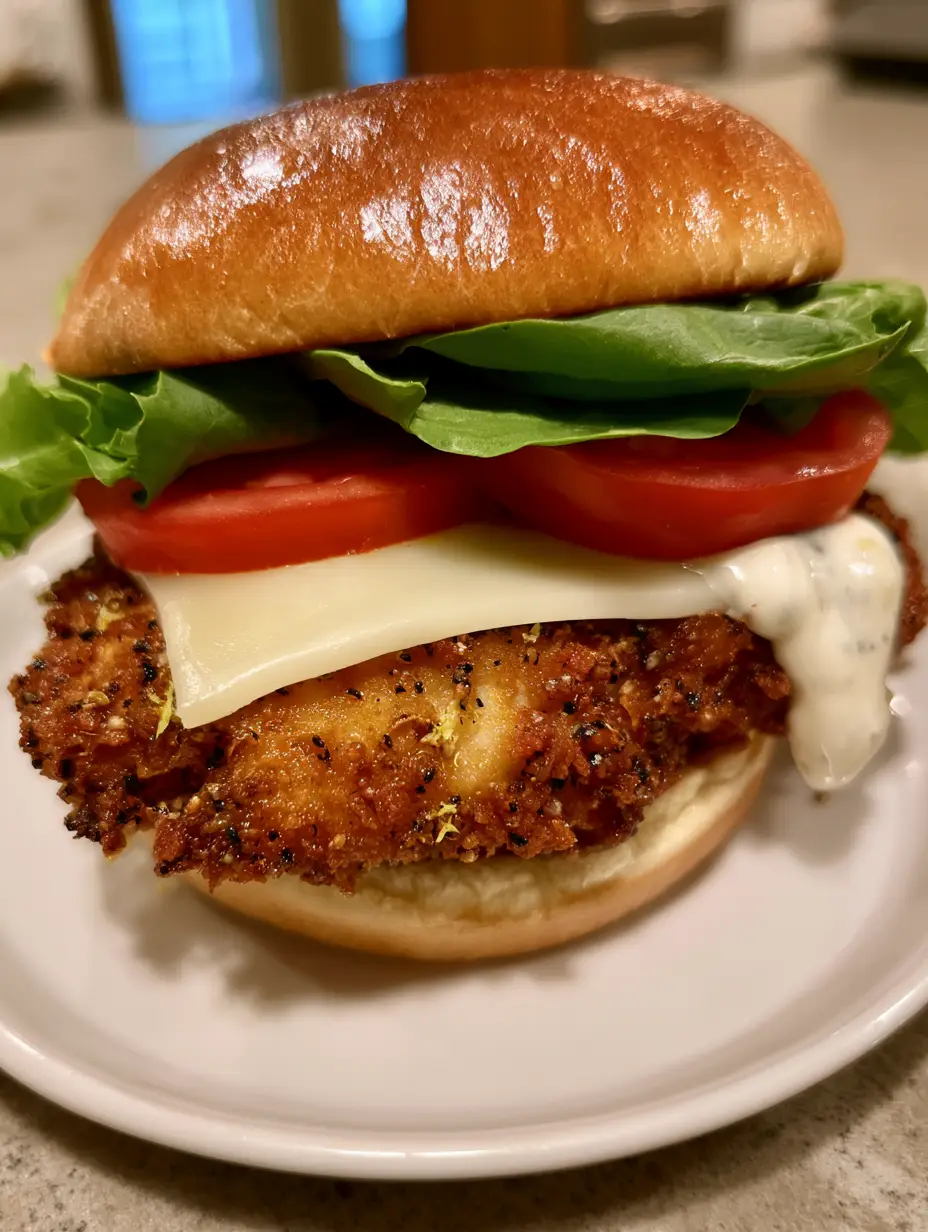
This sandwich captures the eye with its vibrant red tomato slices and emerald-green leaf lettuce, but the true star is the visible lemon zest and coarse pepper embedded in the crust. The interplay between the melted Swiss cheese and the thick, creamy lemon-garlic sauce creates a decadent mouthfeel that lingers. Every element has been curated to provide a professional-grade handheld meal right in your own kitchen.
Whether you are hosting a weekend gathering or simply upgrading your lunch routine, this recipe delivers on every sensory promise. From the handheld smartphone-style aesthetic of the glistening bun to the heavy seasoning of the fillet, we are diving deep into the science of the perfect fry. Get ready to master the art of the lemon-pepper dredge and the emulsion of a restaurant-style garlic spread.
Why This Citrus-Infused Poultry Masterpiece Wins Every Time
- Textural Harmony: The contrast between the pillowy soft brioche and the aggressive, “shatter-crisp” exterior of the fried chicken fillet is unparalleled.
- Zesty Profile: Using both fresh lemon zest and juice ensures a bright, multi-dimensional citrus flavor that cuts through the richness of the fried coating.
- Peppery Punch: Unlike pre-ground pepper, using freshly cracked black peppercorns provides a floral aroma and a heat that builds gently without overpowering the palate.
- The “Ooze” Factor: Our custom lemon-garlic sauce is engineered with a thick viscosity to ensure it stays creamy while providing that iconic “oozing” visual from the side of the sandwich.
- Visual Appeal: With vibrant layers of red tomato and fresh green leaf lettuce, this sandwich looks as incredible as it tastes, making it a social-media-ready triumph.
Essential Elements for the Ultimate Citrus Crunch
Boneless Skinless Chicken Breasts: We use thick, high-quality breasts that are pounded to a uniform 1/2-inch thickness. This ensures the chicken cooks evenly, reaching a safe internal temperature of 165°F (74°C) at the same moment the crust achieves maximum golden-brown crispness.
Toasted Brioche Buns: A glossy brioche bun provides the necessary structural integrity and a hint of sweetness. Toasting the bun with a thin layer of butter creates a moisture barrier, preventing the lemon-garlic sauce from making the bread soggy.
Fresh Lemon Zest and Juice: Two large lemons are required for this recipe—one for the zest in the breading and one for the juice in the sauce. The zest contains essential oils that withstand the high heat of frying, maintaining that bright citrus aroma.
Cracked Black Peppercorns: For the most authentic Crispy Lemon Pepper Chicken Sandwich experience, use a coarse grind. This provides a visible “salt and pepper” aesthetic and a textured bite that pre-ground pepper simply cannot replicate.
Swiss Cheese Slices: Swiss is the ideal choice for its mild, nutty profile and excellent melting capabilities. It drapes over the hot chicken fillet, acting as a delicious “glue” for the lettuce and tomato toppings.
Green Leaf Lettuce & Red Tomatoes: Freshness is key here; use crisp green leaf lettuce for height and ruffled texture. Sliced ripe red tomatoes provide a juicy, cooling contrast to the seasoned, hot chicken.
Creamy Lemon Garlic Sauce: This is a sophisticated emulsion of 1/2 cup (120ml) mayonnaise, fresh garlic, and lemon juice. It adds a luxurious, cooling element that ties the sharp pepper and bright citrus together.
The Dredging Station (Foundational Ingredients): You will need 1 cup (125g) all-purpose flour, 1/4 cup (32g) cornstarch for extra crunch, and 1 cup (240ml) buttermilk. The buttermilk tenderizes the chicken through its natural lactic acid, ensuring every bite is succulent.
High-Smoke Point Oil: Approximately 2 cups (480ml) of neutral oil, such as canola or peanut oil, are necessary for frying. These oils can handle the 350°F (175°C) temperature required to achieve that deep golden-brown crust without burning.
Pro-Level Equipment for a Flawless Fry
Cast Iron Skillet: A heavy-bottomed cast iron skillet is the gold standard for frying chicken at home. Its ability to retain heat ensures the oil temperature doesn’t drop significantly when the chicken is added, preventing a greasy finish.
Meat Mallet: Pounding the chicken is a non-negotiable step for uniform cooking. If you don’t have a mallet, a heavy rolling pin or even the bottom of a sturdy saucepan will work to level out the chicken breasts.
Instant-Read Thermometer: Precision is the hallmark of an elite home cook. Using a thermometer to track both the oil temperature and the internal chicken temperature guarantees safety and perfect texture every single time.
Wire Cooling Rack: Never rest fried chicken directly on paper towels for more than a few seconds. A wire rack allows air to circulate around the entire fillet, keeping the bottom just as crispy as the top.
The Step-By-Step Blueprint to Chicken Sandwich Perfection
Preparation and the Buttermilk Bath
Begin by prepping your chicken breasts, slicing them horizontally if they are particularly thick. Place the chicken between two sheets of plastic wrap and use your meat mallet to pound them to a consistent 1/2-inch thickness. This step is crucial for the “thick, golden-brown fried chicken fillet” look described in our visual blueprint.
In a large bowl, whisk together 1 cup (240ml) buttermilk, 1 tsp (5g) salt, and 1/2 tsp (2g) black pepper. Submerge the chicken fillets in this mixture and refrigerate for at least 30 minutes, or up to 4 hours. The buttermilk brine ensures the meat remains juicy even after being subjected to the high heat of the deep fryer.
Mastering the Lemon Pepper Dredge
In a shallow dish, combine 1 cup (125g) all-purpose flour, 1/4 cup (32g) cornstarch, 2 tbsp (12g) coarsely cracked black pepper, and the zest of one large lemon. The cornstarch is our “secret weapon” for a glass-like crunch that stays crispy even under the weight of the Swiss cheese. Whisk these dry ingredients thoroughly until the black pepper and lemon zest are evenly distributed.
Remove a chicken fillet from the buttermilk, allowing the excess to drip off. Press the chicken firmly into the flour mixture, ensuring every crevice is coated. For an extra-thick crust, you can dip it back into the buttermilk and then into the flour a second time—this is known as double-dredging.
Achieving the Golden-Brown Sear
Heat 2 cups (480ml) of oil in your cast iron skillet over medium-high heat until it reaches 350°F (175°C). Carefully lower the dredged chicken into the oil, laying it away from you to avoid splashes. Fry for 5-6 minutes per side, listening for that vigorous sizzling sound which indicates the moisture is being cooked out of the crust to create a crunch.
Watch for the visual cue: the chicken should be a deep, honey-gold brown. Use your thermometer to ensure the center reaches 165°F (74°C). In the final minute of cooking, place a slice of Swiss cheese on each fillet and cover the pan for 30 seconds to achieve that perfect, glossy melt.
Whisking the Signature Lemon-Garlic Spread
While the chicken rests on a wire rack, prepare the sauce that will “ooze” from your sandwich. In a small bowl, combine 1/2 cup (120ml) mayonnaise, 1 grated garlic clove, 1 tbsp (15ml) fresh lemon juice, and a pinch of salt. Whisk until smooth and glossy. This sauce provides the creamy white contrast against the dark, peppery crust of the chicken.
Expert Tips for a Restaurant-Quality Sandwich
- The Temperature Rule: Always let your chicken sit at room temperature for 15 minutes before frying. Cold chicken drops the oil temperature too quickly, leading to a soggy, oil-logged breading.
- Zest Timing: Add the lemon zest to the flour just before dredging. This keeps the zest fresh and prevents it from clumping, ensuring those bright yellow flecks are visible on the finished Crispy Lemon Pepper Chicken Sandwich.
- Bun Toasting: Smear a little butter on the brioche buns and toast them in a dry pan until golden. A toasted bun is structurally superior and adds a professional “glossy” finish to the base.
- Resting Period: Allow the fried chicken to rest for at least 3 minutes on a wire rack before assembly. This allows the juices to redistribute, ensuring they stay inside the meat rather than soaking into your bun.
The Best Ways to Store and Reheat Your Leftovers
If you have leftover fried chicken, store the fillets separately from the buns and vegetables in an airtight container in the refrigerator for up to 3 days. To maintain the “crispy” nature of the sandwich, avoid the microwave for reheating, as it will make the breading rubbery.
For the best results, reheat the chicken fillets in an oven or air fryer at 375°F (190°C) for about 5-8 minutes until the exterior crisps back up. Assemble the sandwich with fresh lettuce, tomato, and sauce only when you are ready to eat to ensure the textures remain distinct and vibrant.
What to Serve With This Zesty Chicken Sandwich
A sandwich this bold deserves sides that can stand up to its flavor profile. For a classic deli experience, serve this alongside a chilled bowl of creamy macaroni salad or a refreshing cucumber and beetroot salad to balance the fried richness.
If you’re looking for more handheld options for a party spread, consider pairing these with mini fried chicken sliders or even some Old Bay crab cakes for a “land and sea” platter. To finish the meal on a sweet note, a slice of southern peach cobbler cheesecake provides the perfect fruity contrast to the lemon and pepper notes.
Frequently Asked Questions
Yes! Spray the breaded fillets generously with oil and air fry at 400°F (200°C) for 12-15 minutes, flipping halfway through, until the internal temperature reaches 165°F.
The secret lies in adding cornstarch to your flour dredge and ensuring your oil is at a steady 350°F (175°C). Cornstarch inhibits gluten development, resulting in a lighter, crunchier texture.
By mixing the zest directly into the flour dredge, it is protected by the starch and moisture of the buttermilk, allowing it to release its oils without scorching.
Spread a thin layer of butter on the cut sides and toast in a skillet over medium heat for 1-2 minutes until golden brown and slightly firm.
Swiss cheese has a higher moisture content and a milder flavor that melts beautifully without overpowering the delicate citrus and black pepper notes of the chicken.
The Ultimate Crispy Lemon Pepper Chicken Sandwich Recipe
Crispy Lemon Pepper Chicken Sandwich: The Ultimate Gourmet Crunch Guide
Ingredients
Equipment
Method
- Pound chicken breasts to 1/2-inch thickness. Submerge in 1 cup (240ml) buttermilk with salt and pepper for at least 30 minutes in the refrigerator.
- In a shallow bowl, whisk together 1 cup (125g) flour, 1/4 cup (32g) cornstarch, 2 tbsp (12g) cracked black pepper, and lemon zest.
- Remove chicken from buttermilk and coat thoroughly in the flour mixture, pressing to adhere.
- Heat oil to 350°F (175°C) in a cast iron skillet. Fry chicken for 5-6 minutes per side until deep golden brown and internal temp is 165°F (74°C).
- Place Swiss cheese slices on the hot chicken in the last minute of frying and cover briefly to melt.
- Whisk together 1/2 cup (120ml) mayo, grated garlic, and 1 tbsp (15ml) lemon juice.
- Spread sauce on toasted brioche buns. Layer with green leaf lettuce, red tomato slices, and the crispy chicken fillet.
Notes
Double-dredge the chicken for an extra-thick, crunchy crust.
Join the Community and Share Your Creations!
There is nothing quite like the satisfaction of mastering a Crispy Lemon Pepper Chicken Sandwich at home. We hope this guide helps you achieve that perfect, golden-brown crunch and zesty finish. If you enjoyed this recipe, please leave a comment below and let us know how your sandwich turned out!
Don’t forget to sign up for our newsletter for more elite-level recipes and culinary secrets delivered straight to your inbox. If you’re looking for more visual inspiration, follow us on Pinterest and pin this recipe to your “Dinner Goals” board for later!